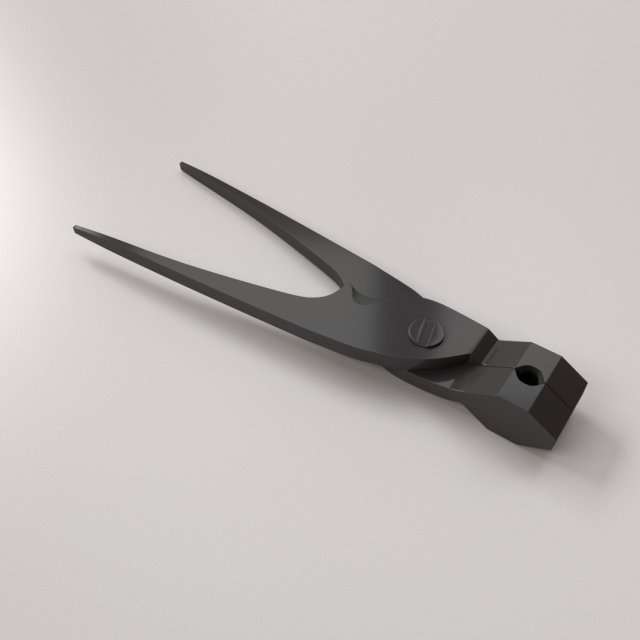
BULLET MOULD===============================- Modeled in Blender.- Preview image rendered using cycles.- All scene are included in .blend files.- Poly count are before sub division- Great for close up render.- All parts and materials are logically named.OTHER FORMATS=================- 3ds MAX- COLLADA (.dae)- Autodesk FBX- OBJ
Tag: Mould
-
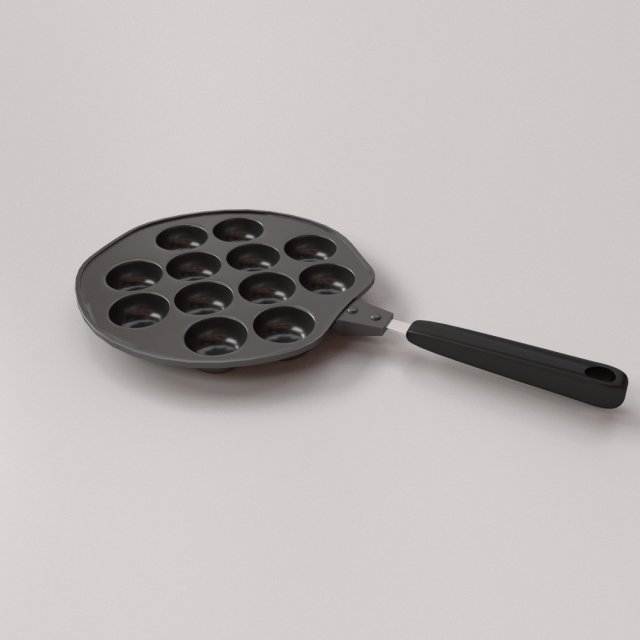
Takoyaki Pan 3D Model
TAKOYAKI PAN=================================- Modeled in Blender.- Preview image rendered using cycles.- All scene are included in .blend files.- Poly count are before sub division- Great for close up render.- All parts and materials are logically named.OTHER FORMATS=================- 3ds MAX- COLLADA (.dae)- Autodesk FBX- OBJ
-
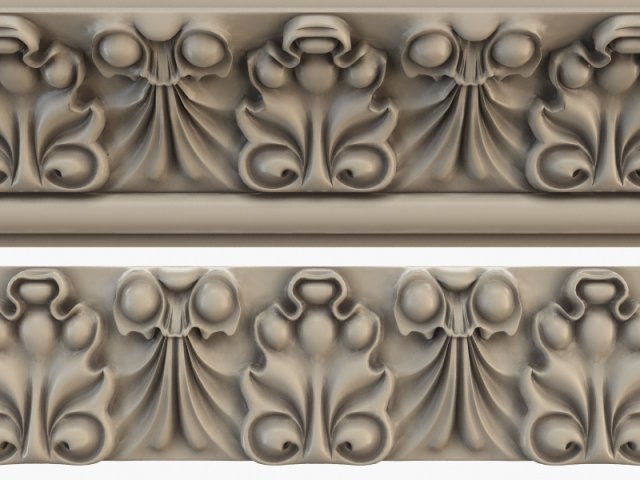
Cornice CNC 3D Model
– Photorealistic moulding.- Executed in 3d max 2009.- All textures and materials needed for the rendering found in the archive.- Smoothing modifier is stored in the stack for convenience.-Gamma 2.2-Correction of textures and materials mood in 3d max, as well as tiling textures because of possible problems with the display of textures and materials in other programs distinct from 3d max and Vray-So there is an archive with de scene full studio tuned light.-For all questions with regards to the model, you can contact me through the administration of the site, if you want something to fix or correct, if something does not work-CNC and 3d printable ready
-
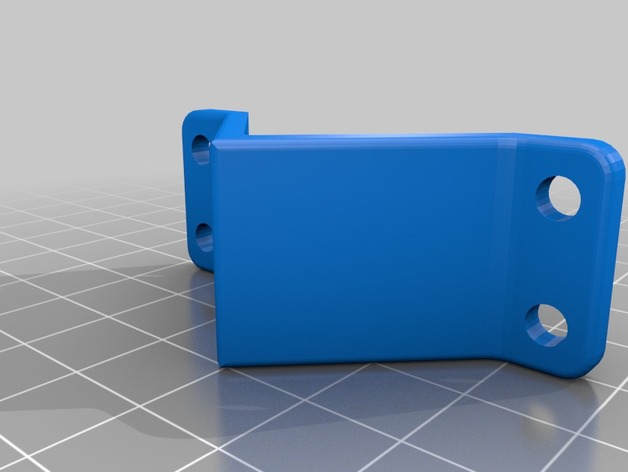
Mk.10 Extruder Silicone Cover Mould 3D Print Model
Summary
This is a mould for a high temperature silicone insulator for the MK10 heater block as fitted to the Wanhao i3 Plus and other printers. Gives a 3mm insulating shell around the outside of the block with ports for the cartridge and thermistor wiring.
Post-Printing
Parts required
You’ll need 4xM4 screws and nuts to bolt the two halves of the mould together. The flanges are 3mm thick so M4x10 should just about do it.
To mould you’ll need to fill half the mould with your silicone – if you can’t get a runny 2 part mix then try to pipe it into the corners. Push the insert in and make sure the silicone is flush with the top. The cross on top should allow the cover to be removed over the insert once cured.