Summary
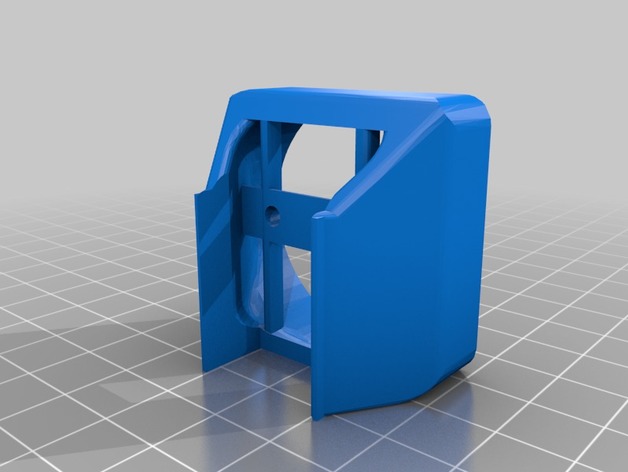
centrifugal fan support for E3D hotend
Overview and Background
Summary
centrifugal fan support for E3D hotend
Overview and Background
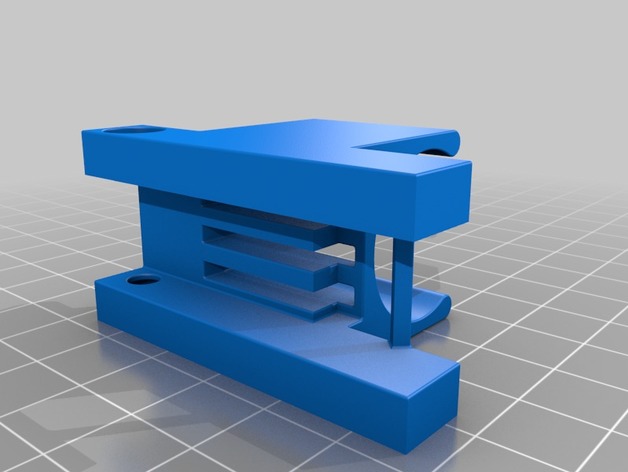
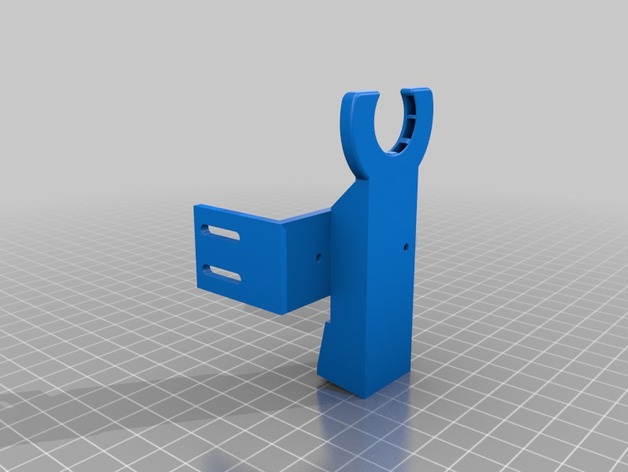
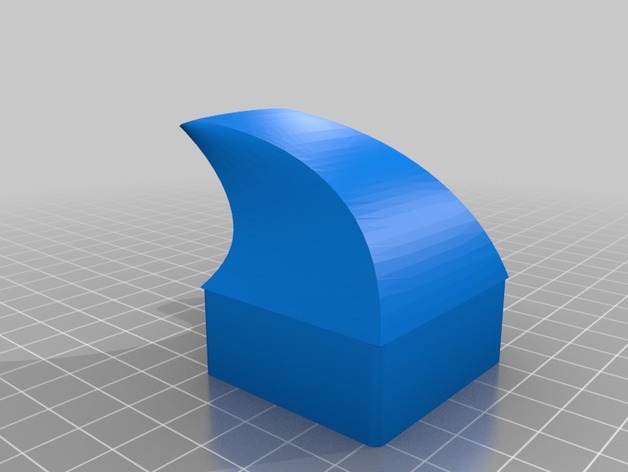
Summary
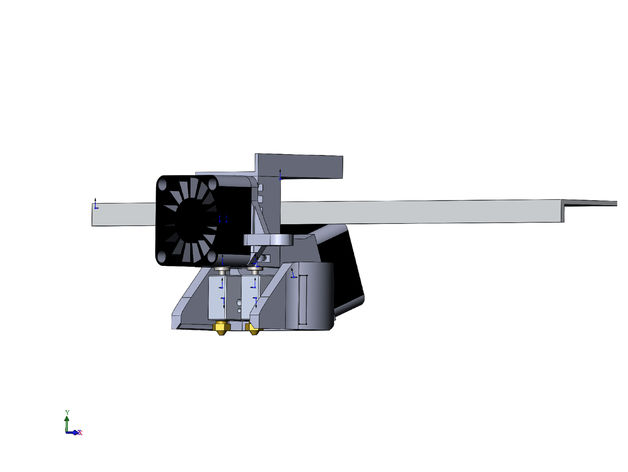
axial fan support for E3D hotend 40×40
Summary
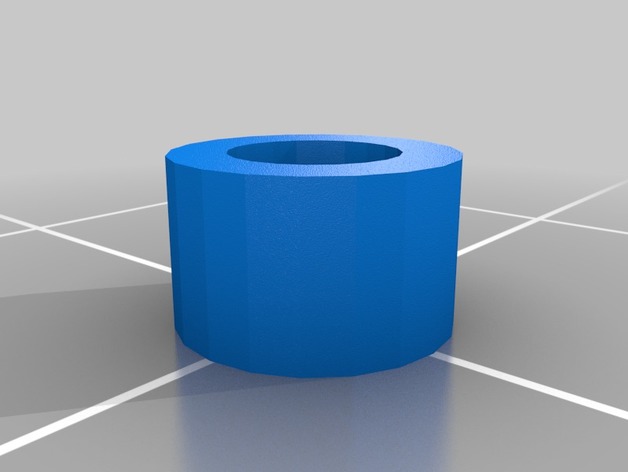
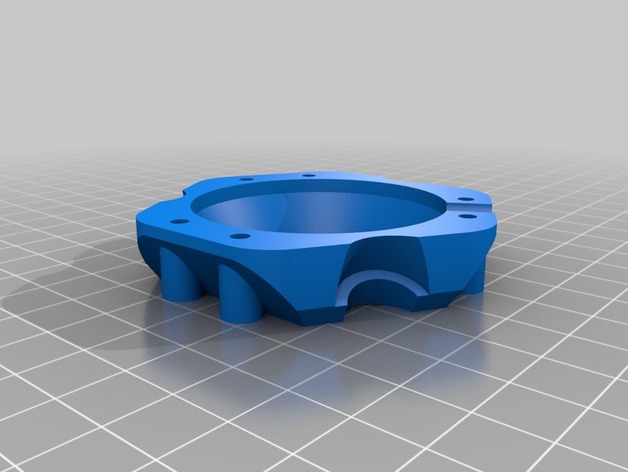
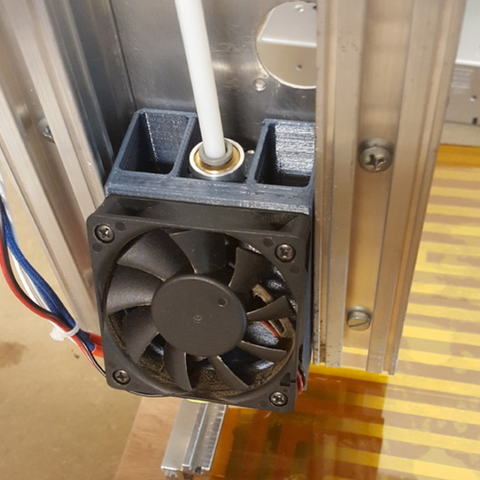
The screws that attach the fan to my hotend in my Maker Select Plus / Wanhao Duplicator Plus bent. Those screws are apparently M3 x 37MM. I couldn’t find those anywhere, so I purchased very common M3 x 40MM bolts, and designed this spacer to make it fit correctly. It goes in between the bolt and the fan.
Print Settings
Printer:
Maker Select Plus Rafts:
Doesn’t Matter Supports:
Doesn’t Matter Resolution:
.1MM Infill:
Doesn’t Matter
Summary
I recently picked up a Micro Swiss 300c Hot End, and the mount I had been using on the stock hot end no longer worked. Modified the STL in Tinkercad. Good snug fit on mine. Let me know of problems.
Usiing this fang which has better cooling than a fang with the 40mm fan: https://www.thingiverse.com/thing:2446196
Summary
This is a cooler/BLtouch mount for the stock hotend with the 713maker gantry. This is still a work in progress
Summary
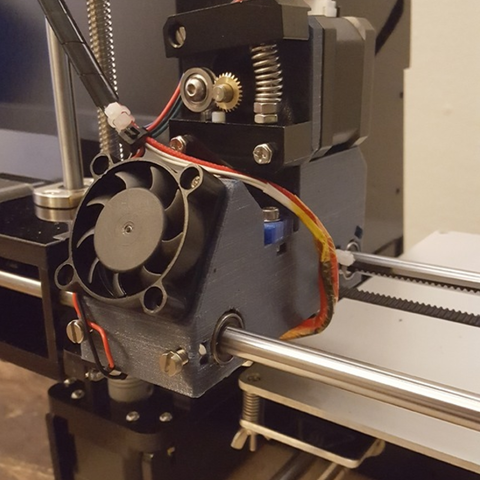
I wanted to upgrade my MP select mini (V1) with an e3d hot end, but couldn’t find a holder for it that didn’t require an additional new fan. The closest I could find was Toolboxx’s upgrade for a single fan, but that still assumed I would be switching out the fan for a 40mm fan. So I did a simple remix.
All the 3D printed parts you need are included. You will need 2 M3x15mm screws and M3 bolts.
Summary
Wanted a good way to attach the 5050 LED strip to underside of X carriage(without making a new one). Modified the bracket to bolt onto the bearing holder screws.
Print Settings
Printer:
Davinci 1.0 Rafts:
No Supports:
No Resolution:
0.2 Infill:
15

Summary
I originally printed the first one. I really like the design. The only problem is that the sensor sits too low to use the v6 hotend with a bowden extrusion setup. The highest you can raise it on the original, you were stil about 4mm away from the print surface.
So I chopped it a bit to make it higher, and gave it some more adjustment room.
I have not tested it. I haven’t had a chance to print it yet as the printer is not quite together yet.
Summary
a modular ring to hold the diamond hotend. has holes for the fan and a slot for the wires. might be best to print it upside down. to be used with my modular ring shield
Summary
Model ONLY for ZAV hotend
It’s beta version. Not tested yet V0.1.
You can test it and write comments
Print Settings
Printer:
ZAV Rafts:
No Supports:
No Resolution:
0,2 Infill:
20 Notes:
I print it without support
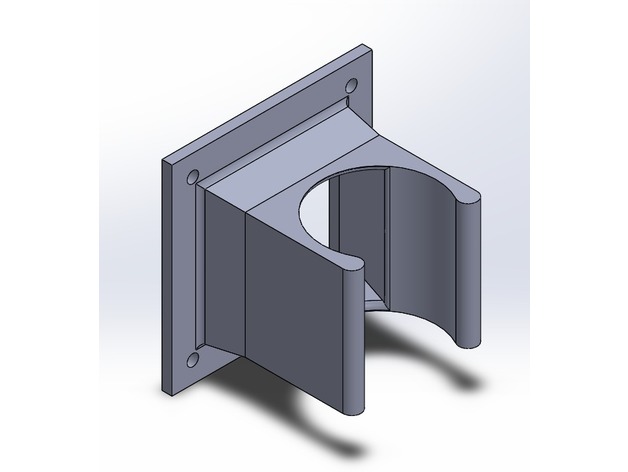
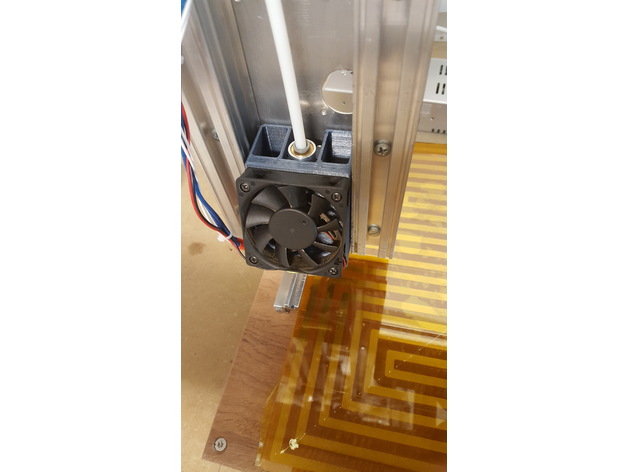
I wanted to mount a chines J-hotend to a A6 Anet printer, but for that i had to make a new X wagen.
The dimentions for the cooling fins/parts are: diameter 22,25mm X 26mm.
This is a hotend setup for my custom router. The idea behind it is that the airflow can reach the cooling fins of the hotend without cooling the printed object. It’s ment for ABS & PET-G printing. Sorry PLAérs ;-).
Summary
I liked maggiman2001’s design but wanted the opening to be in the middle since my SanjiuPrinter is dual extruder. I also used a chamferred edge on the long side.
Print Settings
Printer:
SanjiuPrinter Z360 Rafts:
No Supports:
No Resolution:
.1 Layer height .4 nozzle Infill:
20%
Summary
Left fanduct for L3K extruder with a Simple One hotend.
Small change of original part, just a little too small for me.
Ventilo de refroidissement d’impression pour le très bon extruder L3K équipé d’une hotend Simple One. Petite modification du modèle original qui est 4 à 5mm trop haut dans mon cas et qui souffle sur la hotend.
Summary
This is a hotend setup for my custom router. The idea behind it is that the airflow can reach the cooling fins of the hotend without cooling the printed object. It’s ment for ABS & PET-G printing. Sorry PLAérs ;-).
This part can hold a cheap chinees J-Hotend clone with a diameter of 22.25mm & hight 26mm. The red thing in the picture is a representation of this hotend. The second red thing above it represents a Bowden tube adaptor. The Fan is 60x60mm.
because this part is for a custom machine i didn’t want to share this at first, but perhaps other people can still use it due the maney customizers and self builders i have seen on the internet 🙂
Print Settings
Printer:
i printed the part on the foto on a Anet A6 Rafts:
No Supports:
No Resolution:
0.2 Infill:
15 – 20% Notes:
Just print the main model standing up. tested with PET-G