Summary
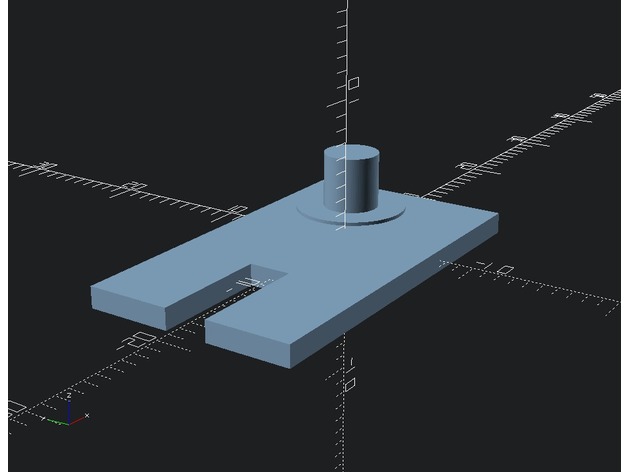
This is a Ghosting fix for the Metal X-axis Carriage.
The Uploaded OBJ is made for the left side of the axis (where the motor is) and can be mirrored to fit on the right side.
it might doesn´t fit instantly but it works as good as it looks.
Any questions/suggestions are welcome in the comments
Tag: fix
-
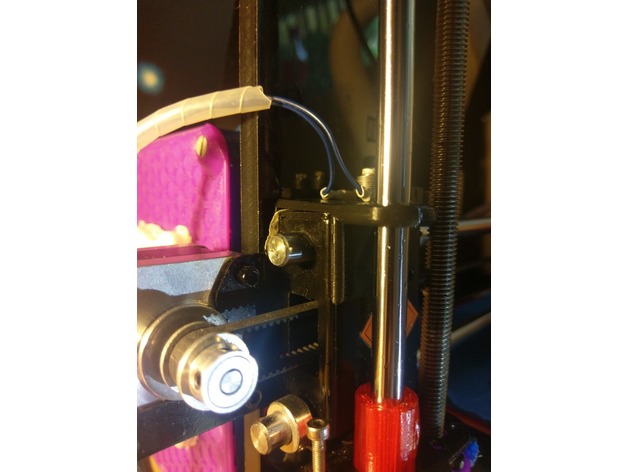
X-Axis-Ghosting Fix Geeetech Pro Series 3D Print Model
-
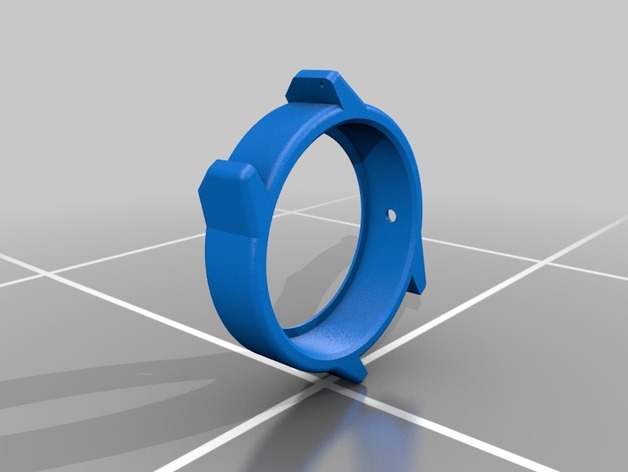
Moto 360 fix 3D Print Model
Summary
This is a fix for the poorly designed moto 360 gen2 sport. It does require taking apart the watch but works great in the end. Might require some light sanding depending.
Print Settings
Printer Brand:
FlashForge
Printer:
Finder
Rafts:
No
Supports:
No
Infill:
10
Notes:
Do 5 shells for best results -
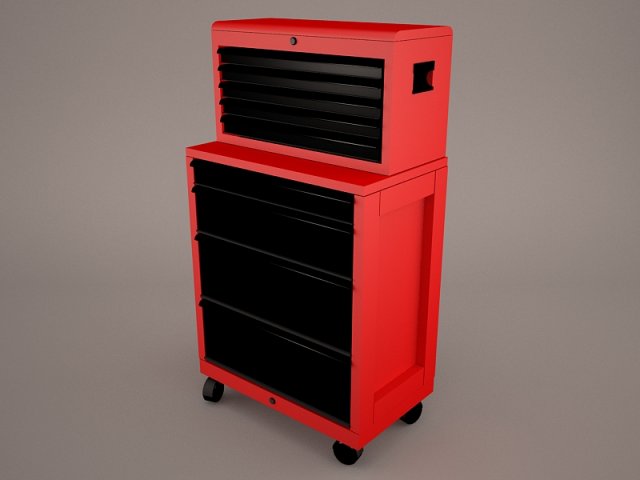
Tool box 3D Model
ToolBox metal steel crate tool box toolset garage racing craftsman tools draftsman wrench mechanic mechanix fix 3d
-
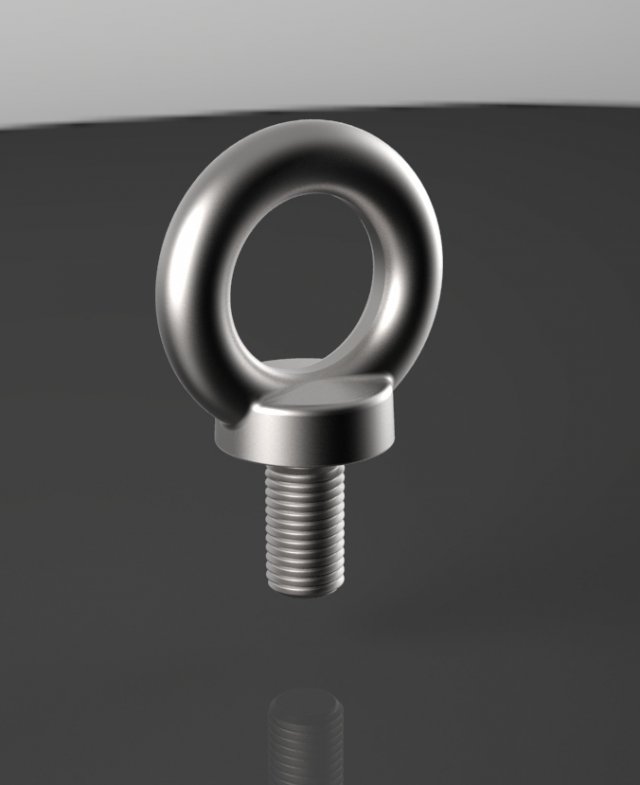
Ringbolt Free 3D Model
A ring bolt is a bolt with a captive ring on one end and threads on the other end.Model dimensions:- height – 95,5 mm- width – 63 mm- thickness – 36 mmDesigned in Solid Works 2012, rendered in Keyshot 5.0.99.
-
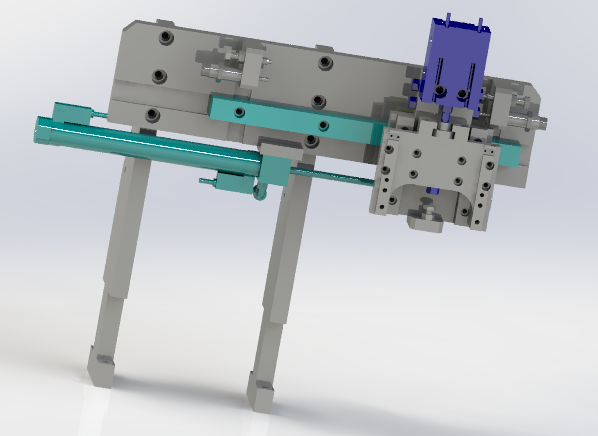
XZ two axial pneumatic manipulator 3D Model
XZ two axial pneumatic manipulator, through the cylinder of manipulator xz axis, the main structure for the cylinder and slippery course, by positioning buffer and a fixed limit at the same time, on the whole in some occasions, such as fixed grasping position can apply mechanically, cost saving, simple structure.This model is transformed into step and iges general model download, please refer to!Also includes 3d original files, welcome to download!if you like,you can paypal for you to get this models or if you have any questions also you can email to me.
-
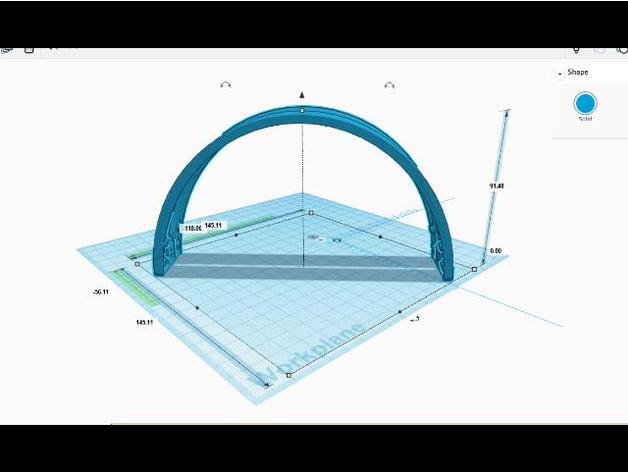
AFTERGLOW PS4 headset strap FIX 3D Print Model
Summary
link to the fix post on my IG (https://www.instagram.com/p/BUeXSMAjafw/?hl=en&taken-by=codename.ide) This is one of those i cant believe it worked prints…i was an amateur…we learn every day! Non the less it will print with supports and when installing on headset keep in mind that you will have to cut headset plastic by the screws to release the wire from the strap….no need to add the metal support strap the headset comes with…the print is very sturdy and retains its shape with enough flexibility to give you a comfortable fit but strong enough to maintain its position on the users head.
Print Settings
Printer Brand:
Prusa Printer:
Prusa Clone Rafts:
Yes Supports:
Yes Resolution:
.1mm Infill:
zigzag at around 15-30% Notes:
This is only the top strap for the afterglow headset… Open with slicer and set print to adequate wall size 1 mm, inner wall outer wall…keep in mind for flexibility you need spacing between the ZIGZAG infill at 15-30%..REMEMBER, keep FLEXIBILITY in mind when tweaking settings..by all means this print CAN NOT BE A SOLID INFILL..
How I Designed This
i BASICALLY measured the straps position from a to b at the base of the straps standing up on both ends then i went with how high the arch went and designed from those parameters with a digital caliper that measures measuring to the tenth of a mm and from edge to edge, measuring heights of holes and angles and how far somthing is from edges…got prety close by first printing a corner of the hole area were screws go into and made sure the size and angles were on point, made proper tweaks, reprint a sample and went with it….it works, chek link… im happy… -
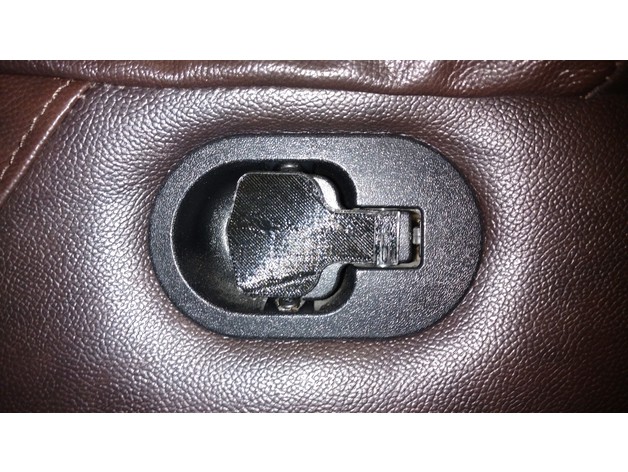
Couch Sofa Release Lever Slip-on Replacement Fix 3D Print Model
Summary
The release lever for my couch snapped-off, so I designed this fix for it. Since a “stub” of the original lever still remained, I designed this thing to slip on over the remaining stub. Printed in black PLA to match the couch, though I realize this makes it a bit hard to see in the photos.
The first photo shows the printed part attached to the couch. The second shows the “stub” that the printed part fits over. The third is a reference photo of a still-intact release lever. The fourth is just the part by itself.
Print Settings
Printer Brand:
Prusa Printer:
Prusa Clone Rafts:
Doesn’t Matter Supports:
Yes Resolution:
0.1 Infill:
20
How I Designed This
Fusion360. The .f3d file is included if you wish to tweak it based on the specifics of how your handle broke. -
80 Series Toyota Land Cruiser floppy vent fix 3D Print Model
Summary
Like many, the vents in my FJ80 are loose from the tabs breaking off. In my case, the “pins” on the vents themselves were sheared off, and the small plates that the pins mate with crumbled when I took them out.
I’ve designed a 3D printable part that fits securely into the vent housing, and has a pin that now fits a hole drilled into the vents themselves. Here’s a render for the middle vent. (the side needs a slight offset.) Dimensions in mm. -

Z Top Fix 3D Print Model
Summary
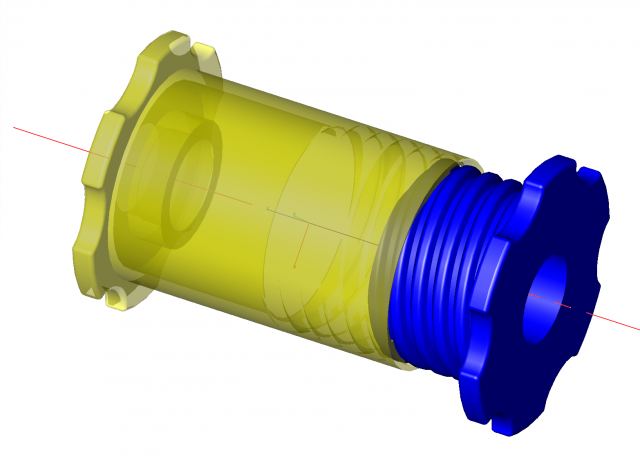
There is an issue on original Z axis rod where the Z rod are neither parallel nor perpendicular ! More details here : https://github.com/prusa3d/Original-Prusa-i3/issues/34
This z axis top solve the problem plus it makes the bracket stronger and it increases the support of Z rod (should reduce Z wobble as well).
It is compatible with Prusa i3 MK2, MK2s and MK2.5.
Please note that you should have a space of 0.5mm between the top of the Z rod and the smaller circle, this is made on purpose. Do not push the rod to the “cap” of this piece but screw it and check that it is square to the frame.
Print Settings
Printer Brand:
Prusa Printer:
i3 MK2S Rafts:
No Supports:
No Resolution:
0.20 Infill:
30-40% Notes:
Use PETG or ABS filament.I am using Extrudr MF-PETG Neon Orange which is very very close to Prusa orange.
3 perimeters
4 top
4 bottom
30-40% infill
seam_position : aligned (Print settings -> Layers and perimeters -> Advanced -> Advanced)
Might be good to reduce the speed a bit because of the small surface on the end of the print. -
Spool adapter 3D Model
Spool adapter to fit filliment spools with 48mm dia hole reduces down to a 20mm hole. also usfell for spools that have come apart
-

Adjustable Wrench model 3D Model
-Modeled in 3ds Max 2016-Rendered using V-Ray 3.40.01Features:- The Object is correctly scaled and centered at the origin- Objects, Materials and Textures are properly named and logically grouped.- No N-GONS: Quads and Triangles only- Smooth function can be used to increase mesh resolution if necessary.- Max file contains geometry with Turbosmooth modifiers applied. – Units of measurement – centimeters.- Object dimensions: 26×7.5×1.6cm- Procedural texture and bitmap scratches 4000×4000 (normal, reflect) – All textures are included in archive- Ready to RENDER. HDRI map included (1500*750)- Clean UVs (Non-overlapping) File Formats:- 3ds Max 2016- 3ds Max 2013- FBX_2012- OBJ Number of polygonsSubdivision Level 0: Polys: 12 414Verts: 12 379Subdivision Level 1: Polys: 99 180Verts: 49 588Subdivision Level 2: Polys: 396 720Verts: 198 358
-

Soldering Iron 3D model 3D Model
Soldering Iron*********************************Features:* High quality polygonal model, correctly scaled for an accurate representation* Substance Designer used* Substance Painter used* Unfold3D used* High Quality textures in PNG format* All objects have proper pivot points locations* Objects are grouped for easy selection & logically named* Non-overlapping UV’s are applied where it is necessary* High quality V-Ray Materials* Studio setup is included* Unique HDRI map is included* Units used centimeters* Real model size* All renders without postproduction* CheckMate Pro Model*********************************File Formats:* .MAX (3ds Max 2012 V-Ray and standard materials scenes)* .3DS (Multi Format)* .OBJ (Multi Format)* .FBX (Multi Format)* .MAT (Material libraries)* Every model has been checked with the appropriate software*********************************Textures Formats:* 4096*4096* 12 PNG* 1 PSD (Photoshop format width layers & logically named for easy redactions)********************************** Warning: Depending on which software package you are using, the exchange formats (.obj, .3ds and .fbx) may not match the preview images exactly. Due to the nature of these formats, there may be some textures that have to be loaded by hand and possibly triangulated geometry********************************** Hope you like it!* Also check out my other models, just click on my user name to see complete gallery.*********************************
-

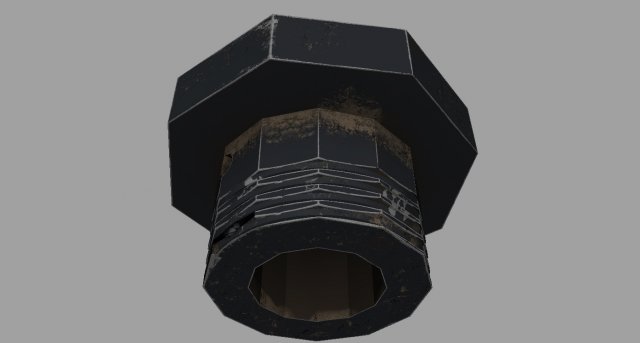
Industrial Overhead Light Game Ready PBR Textures 3D Model
Real-Time,Game Ready, Industrial Overhead Light. Display images were rendered in Marmoset Toolbag 3.Normal maps were baked from a high poly model in Substance Painter. The Normal Maps are baked with the MikkT tangent space setting.Includes the following 3d file types:Max 2014 fileMaya 2015 file.FBX 2014 (with Quad Geometry).OBJ 2014Marmoset 3 File – (the images you see in the thumbnails are using this file)The textures are located in the .zip file. You will also find all the program files located in the .zip folder. We recommend downloading the .zip and opening up your desired 3d format from there, the texture paths should automatically hook up that way.Includes the following PBR texture types (BOTH Metalness and Specular workflows, perfect for Unity, Cryengine and UE4):4096×4096: Ambient_Occlusion4096x4096: Normal Map4096x4096: Diffuse4096x4096: Gloss4096x4096: Specular4096x4096: Base Color4096x4096: Roughness4096x4096: Metalness4096x4096: Emissive4096x4096: Opacity4096x4096: UVSource texture maps from the hi-poly bake are also included so you can re-texture if desired.4096×4096: Ambient_Occlusion4096x4096: Curvature4096x4096: MeshNormals4096x4096: Position4096x4096: Thickness4096x4096: World_Space_NormalNote about textures. The Normal maps are -y, this is fine for directx. If they look flipped, just highlight the green channel in photoshop and hit ctrl+i.If the roughness and metalness look too shiny in say, UE4, you’ll have to make sure they are set to linear. Just double click the texture and uncheck the sRGB box.You can also fix that by combining maps in an image editor like Photoshop.UV’s are mostly flat with a few pieces overlapping where necessary.Units are Metric.Game Ready!Please click on my Username for more Game-Ready models!