Summary
This is a part cooling fan for the CubeX and possibly Cube Pro 3D (not verified) printers. It uses a centrifugal blower (see specs below). The blower spacing is for using extruders 1 and 3. Remember to print two ducts. I will eventually upload a plenum for a 1-2, 2-3, and 1-2-3 option. Constructive feedback is appreciated.
These files are a work in progress. I prefer to have all my parts snap together without fasteners, but the plenum will need to be glued in place for now until I finalize the design.
Fan
Delta Electronics
BFB0512H-R00 (12V)https://www.digikey.com/products/en?keywords=BFB0512H-R00
BFB0524H-R00 (24V)https://www.digikey.com/products/en?keywords=BFB0524H-R00
Flow: 3.9cfm @0.709in H20
Noise: 38dB
Size: 51mm x 51.3mm x 15mm
Hardware
Socket Head Machine Screws M3 x 0.5 mm, 6 mm Long (quantity 2)https://www.mcmaster.com/#91292a111/=17i1kxt
Glue
Loctite Professional Liquid Super Gluehttp://www.loctiteproducts.com/p/sg_bottle_pro/overview/Loctite-Super-Glue-Liquid-Professional.htm
Print Settings
Supports:
No Resolution:
0.2mm Infill:
20% Notes:
Use PETG or ABS.
The models print easily with no supports.
The ducts require a raft so that they don’t get knocked over. If you flip them around the other way, the overhang is too extreme for PETG (on my printer at least).
Post-Printing
Assembly
1) Clean prints of stringing, blogs, and check internals for blockage.
2) Glue the plenum to the bracket with super glue. I use tape to align and secure it until the glue dries.
3) Snap in the two ducts.The ducts snap into place as long as your printer is well calibrated.
4) Screw the assembly onto the front of the carriage using the two outside screw holes where the OEM fan attaches.
5) Slide in the fan wires through the slot and snap fan into place. The blue wire is not used.
6) Connect power to your preferred source on your control board, or build a fused circuit directly from the power supply. Make sure you get the correct voltage fan for your 3d printer.
Tag: CubeX
-
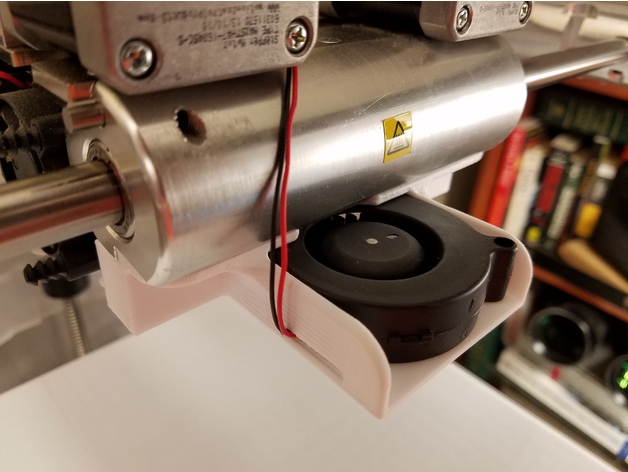
CubeX Part Cooling Fan – Front Mounted 3D Print Model