Summary
Voici une tête d’impression pour creality cr 10 avec titan aero et touch mi
Print Settings
Printer Brand:
Creality
Printer:
CR-10 Mini
Rafts:
Doesn’t Matter
Supports:
Doesn’t Matter
Resolution:
0.2
Infill:
20
Notes:
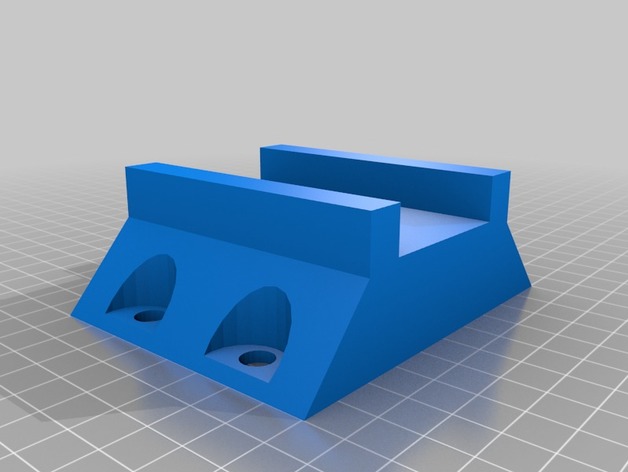
support pour le support ventilateur
Tag: CR-10
-
CR-10 Titan Aero Touch mi 3D Print Model
-
Cr-10 Hot End Model 3D Print Model
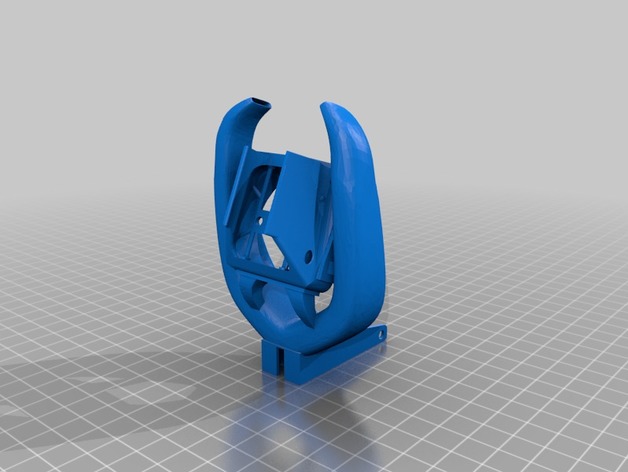
Summary
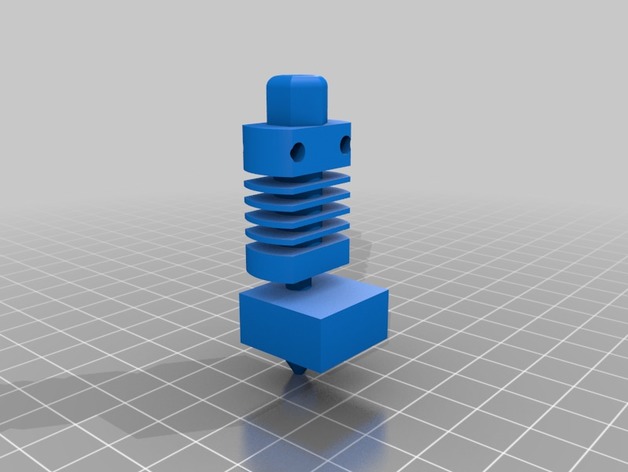
Just a mock up of the CR-10 Hot end
Using it to design a carriage for my custom printer using my spare cr-10 hot end -
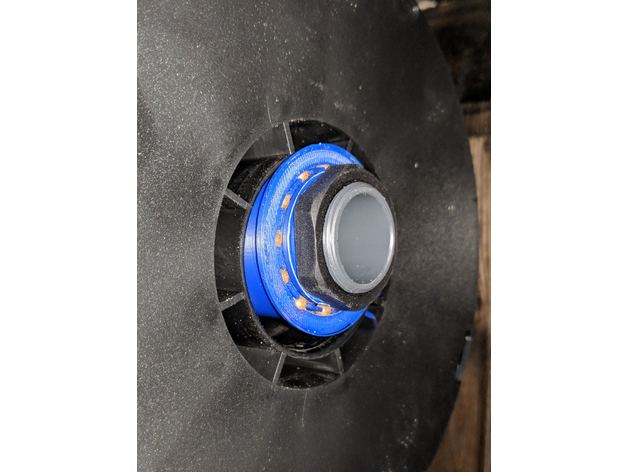
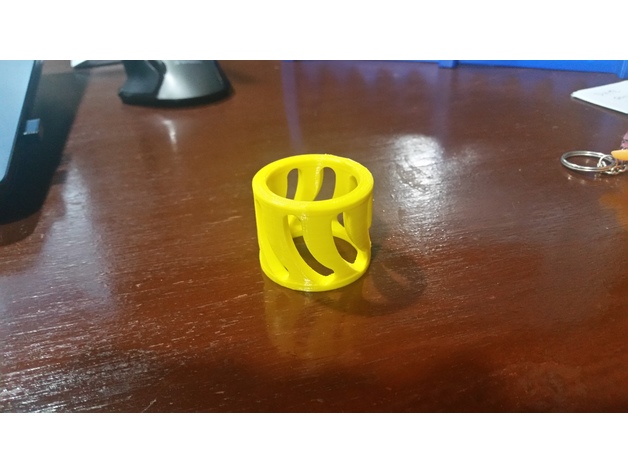
CR-10 Spool Holder 3D Print Model
Summary
I wanted a better spool holder, but didn’t want to completely do away with the stock bracket. This is essentially a sleeve bearing designed to fit over the stock 32mm pipe. It prints in four pieces (you need two dividers) and uses 32x 4.5mm steel BB’s. It can hold any filament spool with a center hole of 54mm or larger.
Print as upright cylinders, no supports. I recommend a brim as it’s not a ton of surface area to stick down. -
CR-10 LED light bar 3D Print Model
Summary
This is a LED light bar for the CR-10. Designed to fit about a 10 inch strip of 5630 LED, plus a mini rocker switch and a 2.1 DC jack. I’m using external DC power because I didn’t want to splice into the printer’s wiring, plus I wanted light to be available even when the printer is off. I have the wires hidden behind using some spare pieces of the decorative plastic. Also, can be mounted with M4 screw + T-nut or just 3M tape.
The opening for the switch is 12.3mm x 20mm, and the opening for the DC jack is 8mm.
Print Settings
Printer Brand:
Creality
Printer:
CR-10S
Rafts:
No
Supports:
No
Resolution:
.2 mm
Infill:
30% -
CR-10 Micro SD Card Adapter Holder – No Text + Cleaned version 3D Print Model
Summary
Thanks Motion_0112 for uploading the original! This is a remix that’s just cleaned up a bit (there were some overlapping faces + extra verts) and I removed the text since added text in 3D prints can cause complications + take longer to print… also I just like the way 3D prints look without text 🙂
Enjoy! -
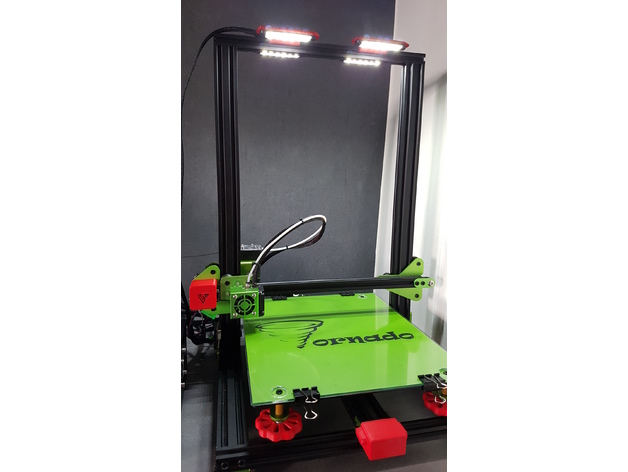
Tevo Tornado – Creality CR-10 Lights (low cost) 3D Print Model
Summary
Système de Leds à petit prix pour l’éclairage de votre Tevo Tornado ou Creality CR-10 :
Vous avez besoin de (Il existe une version 12 et 24volt) : http://www.ebay.fr/itm/10-x-24V-24-Volts-BLANC-6-LED-FEUX-DE-GABARIT-CAMION-CARAVANE-SHASSIS-REMORQUES/322314654417
Pour pouvoir installer la pièce dans le rail de la Tevo Tornado, vous devez retirer les vis du rail coté droit. Exercez une légère flexion de la pièce support et tout en tenant la flexion faites la glisser lentement dans le rail, puis relâcher.Vous pouvez ajouter un vis M3-M5 munie d’un T-nut.
Les leds sont branchées en parallèle (12-24v) directement sur l’alimentation (24v pas 110-220v)
Pour que la pièce soit solide, je conseille 90% d’infill.
Low cost led lights in 12-24 v.
You need in (12 or 24v): http://www.ebay.fr/itm/10-x-24V-24-Volts-BLANC-6-LED-FEUX-DE-GABARIT-CAMION-CARAVANE-SHASSIS-REMORQUES/322314654417
To be able to install the part in the TT rail, you must remove the screws from the rail on the right side. Exercise a slight bending of the support piece and while holding the flexion slowly slide it into the rail and then release. You can add a M3-M5 screw fitted with a T-nut.
The leds are connected in parallel (12-24v) directly on the power supply (24v not 110-220v)
For the piece to be solid, I advise 90% infill.
Print Settings
Printer Brand:
TEVO
Printer:
Tornado
Rafts:
No
Supports:
Yes
Resolution:
0.2
Infill:
90 -
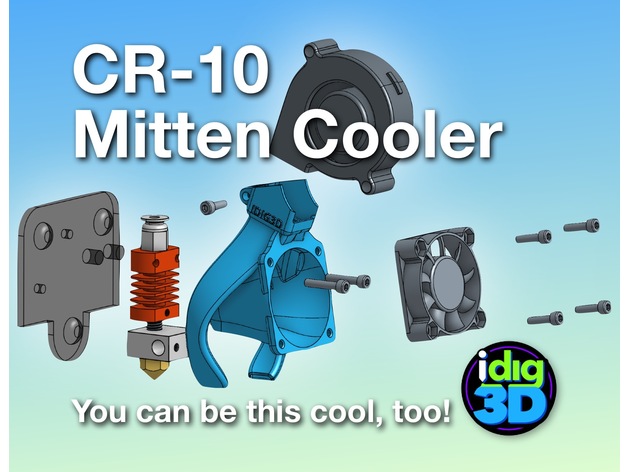
CR-10 / Tronxy Mittens Cooler 3D Print Model
Summary
Let’s keep it cool!
My take on a better cooler for the CR-10 Tronxy X1/3 type hotend. The stock CR-10 set up can cool the heater block too much if you don’t have it wrapped. The parts doesn’t cool all sides well. My Tronxy X3 didn’t have a parts cooler and the heater block couldn’t get temps over 205C.
I tried a couple other popular coolers but did not fit my original parts blower or just not that efficient.
So the Mittens Cooler evolved. Printed in PETG, it weighs 12 grams. Has a bit fo a twist for a little vortex of air.
Needs a few things: a 5015 blower/fan, a few screws, a bit of rewiring, and a bit of tenacity.
WARINING: It works for me. Your results may vary wildly.
If this helps you, a tip would be nice. At least a like and show your makes.
I’ve gone through dozens and dozens of printed revisions to get to this version. Help keep me in plastic. Thanks!
Please note, this is not compatible with the auto-leveling sensor. Send me one and I’ll try to make one fit.
Print Settings
Printer:
Creality CR-10
Rafts:
No
Supports:
No
Resolution:
0.2mm
Infill:
15%
Notes:
Printed with a 10mm brim. My CR-10 took about 2 hours to print.
2 perimeters/shells, 5 top and 4 bottom layers.
I printed in PLA to get started then switch to better temperature-resistance PETG.
Has a built-in support piece (square patch) that should snap out easily. If not, you may have a bit of over-extrusion.
Post-Printing
Clean up
Break out the square support. Careful using hobby knife, trim away the brim and any stray printed strands.Check the parts blower outlets and clean up as needed.
WARNING: Use at your own risk. I’ve tested this best I can at this time and works great for me. Your results may vary greatly.
Gather parts
existing 40mm fan
M3x12 or possible 10s (2-4) — for mounting fan to Mittens Cooler (should be able to reuse existing screws)
5015 blower/fan (needs to be wired–splice and solder or add a connector)
M3x8 screw — for holding 5015 fan/blower
M3x16 screw (2) — for attaching Mitten Cooler and block to mount (should be able to reuse existing screwsDisassembly
Disassemble the hot end removing the housing screws and the fan mounting screws.
Wire in the new 5015 fan.blower paying attention to red and black wiring.
Save the screws since some can be reused.Assembly
The screws should thread themselves into the Mitten Cooler. If they are super tight, you may be over-extruding. Ream the holes bit and try fitting the screws again.
make sure the printer is off
snap the hot end in the back of the Mitten Cooler with the heater wiring to the left
line up the mounting holes to the top two holes on the finned cooling block
push through the M3x16 screws
check to make sure the parts cooling outlets are above the nozzle opening
carefully line up to the mount
tighten screws — if there is an resistance, make sure the screws are aligned properly
insert the 5015 fan/blower
insert the Mx8 screw in the top hole
tighten screw to snuggle hold the 5015 fan/blower
screw in the 40mm fan using M3x12/16. Can get by with just two screws. Snug but not too tight or you could warp the fan adding more noise
check clearance on everything and the give it a go -

Creality Cr-10 Toolbox 3D Print Model
Summary
This is a toolbox that also acts as a base for the Creality Cr-10 control box. It keeps the electronics box high so it is better ventilated from the bottom fan. Due to its size I made it in two pieces and glue them together with superglue (I used medium CA). It is my first design in sketchup, feel free to remix.
Print Settings
Printer:
Creality Cr-10 Rafts:
No Supports:
No Resolution:
0.4 Infill:
20% -
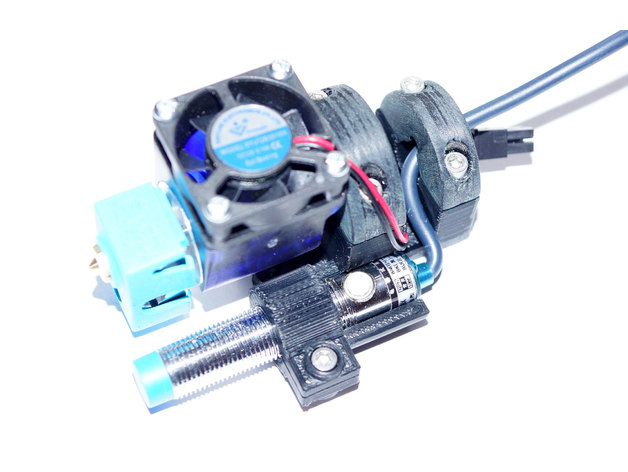
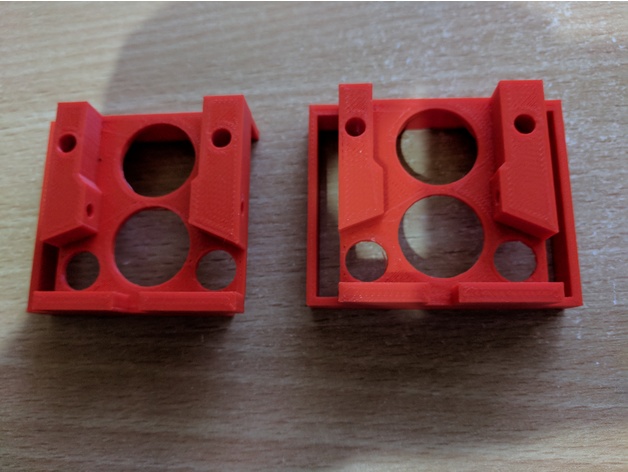
Rock-solid E3D V6 mount for CR-10 with 12mm ABL sensor support 3D Print Model
Summary
Since I would like to change my CR-10 hotend to a more reiable one in terms of clogging (my PTFE tube alway melts after printing ABS at 250 degree) I’ve decided to go for an original E3D V& hotend. OK, it’s not the cheapest solution but in terms of construction it really convinced me since the PTFE tube is to going straight down to the heated block but ends in the cold zone of the hotend.
So I waas looking for a mount that allows me to attach my new hotend to my CR-10 and lets me add an ABL sensor in addition. Unfortunately I could not find any that was working for me. Some were too bulky, some had some construction issues and some simply did not support ABL or the ABL holder was too weak.
Therefore I’ve started to build one from scratch which can be found attached. It fits very well to the CR-10 plate and is easy to print (just print the STL files as they are. The mount.STL migh need some supports to be printed well).
Also the construction is rock-solid – no shaky ABL sensor and no movement of the whole construction.
The ABL Sensor has been placed as close as possible to the nozzle so measurement discrepancies should be as low as possible if the bed is a little uneven. For ABL I’ve used the following capacitive sensor: Heschen LJC12 A3–5-Z/BX.
Print Settings
Printer:
Creality CR-10 Rafts:
No Supports:
Yes Resolution:
0.2 mm Infill:
30% Notes:
Use ABS because of hotend temperatures. Some supports might be needed for mount.stl.
How I Designed This
The mount had been designed in 123D Cad. Used the sensor and the E3DV6 hotend as reference and also did some trial and error when designing the whole mount.
The first design was paying attention to get the sensor as close to the hotend as possible and to have a minimalistic design – anyway, it failed because the sensor was not getting close enough to the bed.
The second approach was much better since the sensor height was perfect now and a cable clamp had been added. However, when trying to mount it to my CR-10 I’ve noticed that the roller screw was preventing the attachment of the mount.
1st attempt2nd attempt
-
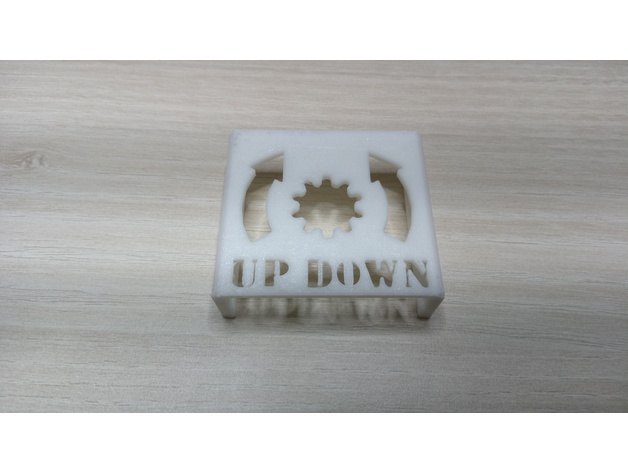
Bed leveling reminder for CR-10, CR-10 mini etc (2040 aluminium) 3D Print Model
Summary
I changed the direction of the arrows.. 🙂
I made this model in sketchup and also uploaded the .skp file so you can edit it. Maybe some resize is necessary.
Print Settings
Printer:
CR-10 mini Rafts:
No Supports:
No Resolution:
0.2 Infill:
20% -
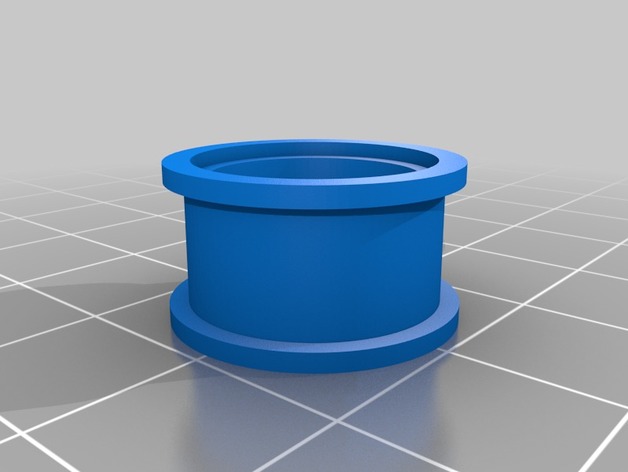
Cr-10 Spool Adapter and Spacer 3D Print Model
Summary
I didn’t like the way the spools rode on the shaft for the Cr-10, so I designed up this spool adapter. If you print one for each side of the spool, they fit over the shaft and inside the spool ID for a much better fit. This also ensures the nut holds the material on, without over tightening. Designed for the Inland 1.75mm 1Kg spools, but works for others as well.
I also recently picked up smaller test spools for glow in the dark and color changing material, and found they were thinner causing the adapters to walk out during printing, so I designed up a quick spacer to solve that problem as well.
Thanks,
Johnny Mac
Print Settings
Printer:
CR-10 Rafts:
Yes Supports:
No Resolution:
.1 layer thickness Infill:
25 Notes:
I used the raft to keep the spool flat against the build plate, but it would likely print without. PLA works fine as these take no load. -
CR-10 Mini X-Axis cover with wire tie 3D Print Model
Summary
remix of a CR-10 part to fit a CR-10 Mini, shortened the wire tie that sticks out, also moved it out of the way of the plug for the x-axis motor. i opted to use higher infill in printing becasue the wire tie part broke off my first print as i was puting it on the machine.
Print Settings
Printer:
HICTOP CR-10 Mini Rafts:
No Supports:
No Resolution:
.15 Infill:
50% Notes:
printed 2 shells, 3 bottem/top layers, bottem/top 30mm/s, rest was printed at 60mm/s
How I Designed This
remixed using fusion 360 -
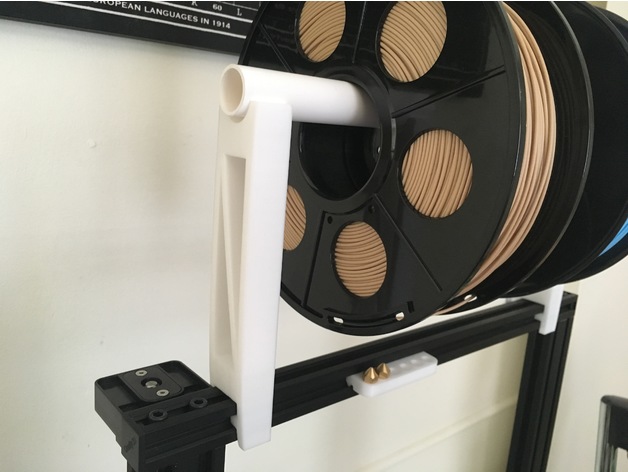
Cr-10 2020 spool holder 3D Print Model
Summary
a spool holder for the Cr-10, it fita on 2020 bars needs a 2cm (D) PVC pipe. -
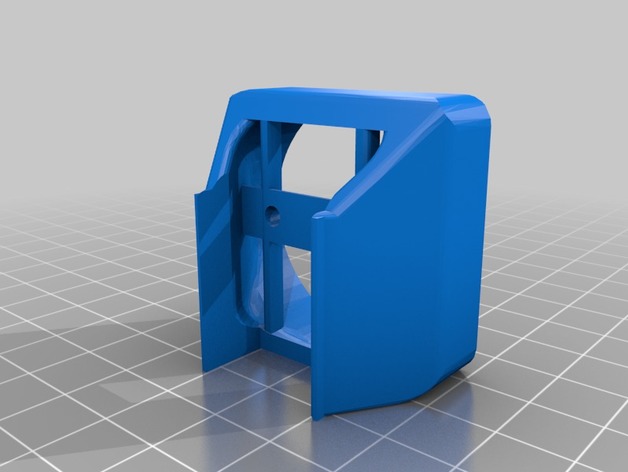
CR-10 Micro-Swiss 300c HotEnd Mount for Fang 3D Print Model
Summary
I recently picked up a Micro Swiss 300c Hot End, and the mount I had been using on the stock hot end no longer worked. Modified the STL in Tinkercad. Good snug fit on mine. Let me know of problems.
Usiing this fang which has better cooling than a fang with the 40mm fan: https://www.thingiverse.com/thing:2446196 -
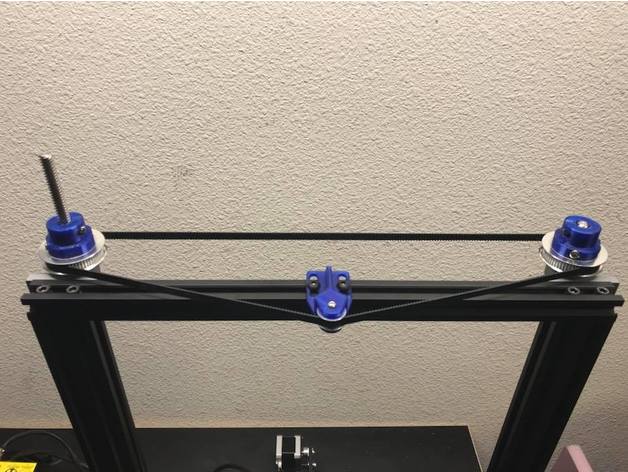
CR-10 Dual Z Pulley Setup 3D Print Model
Summary
As requested here are the files for the dual Z setup I recently set up. One of my main design goals was to not use any set screws. Here are the specific parts I used.
T8 600mm 3D Printer Stainless Steel Lead Screw Coupling Shaft Mounting Bearing
Link: http://r.ebay.com/eVLz50
BIQU GT2 Synchronous Wheel 60 Teeth 8mm Bore Aluminum Timing Pulley for 3D Printer 6mm Width Belt (Pack of 2pcs)
BIQU
Link: http://a.co/eORAb49
BIQU GT2 20Teeth 3mm Bore Aluminum Timing Belt Idler Pulley for 3D Printer 6mm Width Timing Belt (Pack of 5pcs)
BIQU
Link: http://a.co/iPQ3g65
Uxcell a16031400ux0530 3D PRINTER 2GT-6 Ring Closure Timing Belt Closed 852mm Circumference, HSS
uxcell
Link: http://a.co/bhJZ4WH
Print Settings
Printer:
Hictop CR-10 Rafts:
Doesn’t Matter Supports:
Yes Resolution:
.2mm Infill:
50% -
CR-10 X & Y Tensionser Remix Kit 3D Print Model
Summary
So I had some issues with both x and y tensionsers I found here and ended up redesigning some of the parts. After the parts are all printed and the existing pulley/tensioner assemblies, switch the bearings and add the bearing jacket and insert on each one. This is a work in progress so the parts are subject to change. -
Remix Creality CR-10 Bed Leveling Indicator V3 3D Print Model
Summary
remix of CallJoe’s Creality CR-10 Bed Leveling Indicator V2 as it would not go over my air cooling exhaust.
Print Settings
Printer Brand:
FlashForge Printer:
Creator Pro Rafts:
No Supports:
Yes Resolution:
0.18 Infill:
20% Notes:
I added some extra manual supports in S3D to make sure I had no issues and printed on my FFCP as I’m still working out the bed leveling on the CR-10 and my gauge hasn’t arrived yet 🙂
How I Designed This
just used Tinkercad to remove the right hand side -
CR-10 High Clearance Fang Mod for 5015 Fans 3D Print Model
Summary
I really love the high clearance fang mod made by Tacblades.
I really didn’t like the high pitched whine that my OEM blower fan made though and that’s what lead me to remix this.
This is exactly the same as the original, only this accepts a standard 5015 blower fan instead of the OEM fan in the original.
Print Settings
Printer:
CR-10 Rafts:
Doesn’t Matter Supports:
Yes Resolution:
0.2 Infill:
60-100% -
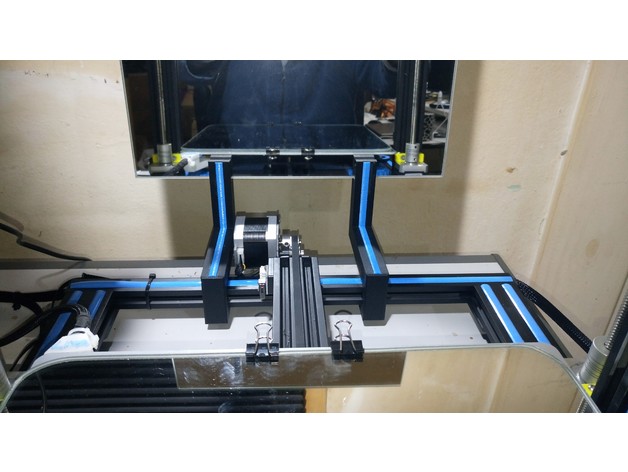
Creality CR-10 stylish back mirror holder 3D Print Model
Summary
Holders for a mirror of about the bed size on the back of the printer to see what it’s being printed from the back side.
Each holder have a sliding fit that clamps the 20 x 20 mm aluminum profile from the printer’s base frame, and another clamp to hold a 4 to 6 mm thick mirror standing up, matching the printer style, leaving enough clearance for the bed to travel backwards and for printed leveling wheels underneath it.
The first STL is the holder that should be printed twice. The second STL is a set of four bands to be optionally printed on the same color from the printer’s original rubber ornaments, to glue against the holder to improve the printer style matching.
Print Settings
Printer:
Creality CR-10 S3 Rafts:
No Supports:
No Resolution:
0.3 Infill:
20% Notes:
Given the holder’s austere smooth surface, it looks fine even if you increase the layer height.I used 0.3 mm height, and 0.2 for the ornamental bands.
If you print the optional bands, glue them against the holder’s grooves, they should fit perfectly inside them.Why?
I felt really stupid after buying a 30 x 30 cm mirror, when finding out that being that the printing surface, the bed was actually bigger, leaving me with an extra mirror after buying another one of the bed size: 31 x 31 cm. I don’t know you, if you did the same of if you just bought an extra mirror on purpose (as I now can tell people I did!), for the practical purpose of improve your viewing of the piece being printed.
Hence, here it is: a holder to prove that extra mirror worth every penny. -
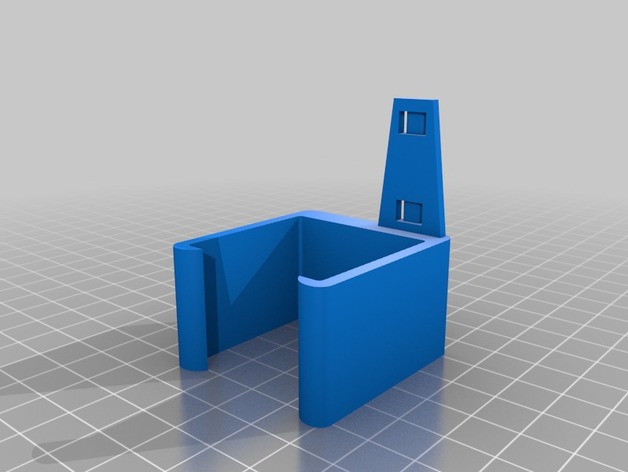
Enclosure for Raspberry Pi 3 and Creality CR-10 3D Print Model
Summary
This is an enclosure that is fastened with screws throw the grid at the side of the controller box. Therefore it is specifically made for the Creality CR-10 but will of course fit at other places when one want the box to be permanently attached to something.
The board is fastened by melting those pins like a rivet. -
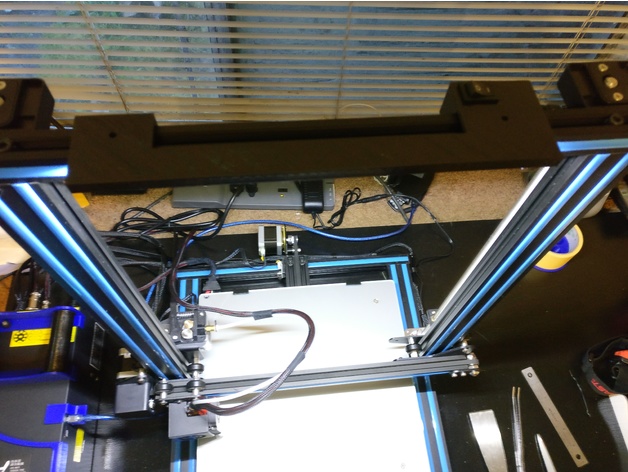
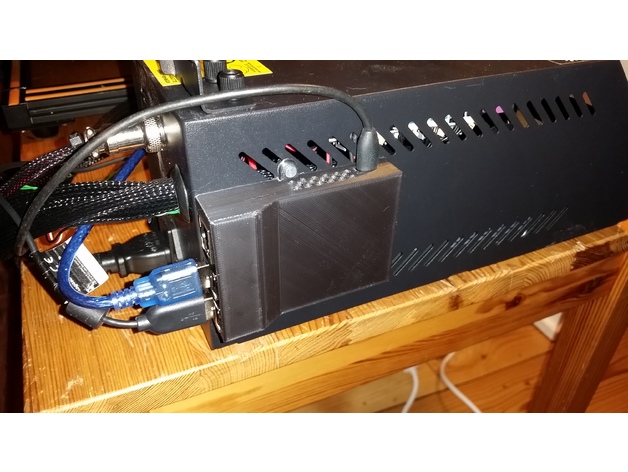
CR-10 Raspberry Pi Integration 3D Print Model
Summary
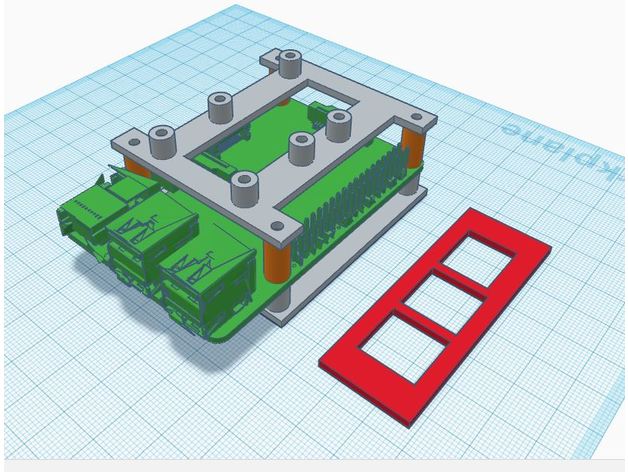
I integrated a raspberry pi inside of the CR-10 electronics case.
Instructions
Cut a 54mm x 20mm hole 11mm from the top and 40mm from the back of the case.
Epoxy pi mount in place. I don’t have measurements of where the mount should be placed as I kind of winged it by attaching the pi to the mount and then placing it where it needed to be.
Epoxy the IO cover to the outside of the case.
Note: The raspberry pi is placed directly over the cable tie mount. The mount will still be usable after installation the wires will just have to be run under the pi.
In addition to the raspberry pi mount there is a mount for a single channel relay and a LM2596 DC-DC adapter with spacers to mount it above the raspberry pi.
Note: If you just want to integrate the raspberry pi and power it with independently the power supply cable can be put through the existing cable grommet.
The pi is powered from the 12V power supply using the LM2596 and using the relay to toggle power to the CR-10 main board. The rear exhaust fan was, replaced with a quieter fan, and rewired to be powered on independently of the main board so that it runs as long as the power supply is switched on. The front fan still powers on with the main board.
I have had this setup install for about 2 weeks now and the printer has been running pretty much non stop since and I have had no issues.
Next time I open the case I will take some pictures of the inside.
Links to parts used.
LM2596:https://www.amazon.com/RioRand-LM2596-Converter-1-23V-30V-1Pcs-LM2596/dp/B008BHAOQO
Single channel relay:https://www.amazon.com/Tolako-Arduino-Indicator-Channel-Official/dp/B00VRUAHLE
Rear fan replacementhttps://www.amazon.com/Noctua-Cooling-Blades-Bearing-NF-A4x10/dp/B009NQLT0M
As for screws: I used the screws that held the old thicker exhaust fan to mount everything as they were the perfect length. To mount the new fan I used some M3x12mm screws that I had around. -

Cr-10 Filament Sensor Bracket 3D Print Model
Summary
PRINT:
NOTE: When using S3D slicer you must do: Mesh -> Separate Connected Surface
Otherwise you will get a hollow bits.
For Cura im not sure if you have this ability, please comment if you know how to fix the issue.
Sorry just my lack of design ability led to this issue.
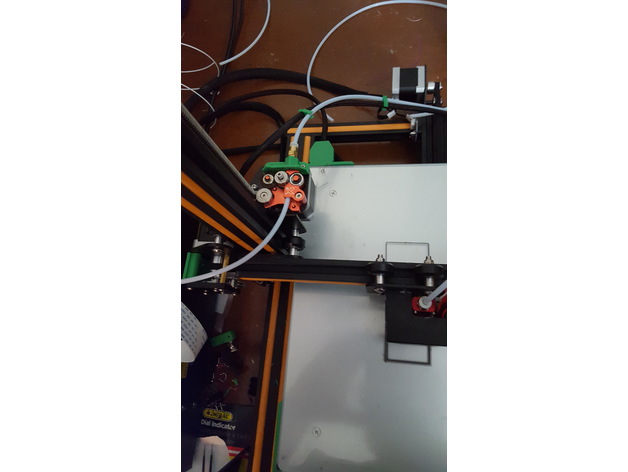
I designed a Bracket to hold a filament run-out sensor i bought off ebay.
This gives my 3d printer the ability to sense when there is no more Filament left, and pauses the print.
It slips over the Extruder, and also has a cable holder integrated.
The design allows it so you can use a small amount of PTFE tube to make it easier for the filament to guide into the extruder motor.
Sensor i used:http://r.ebay.com/PxV1Jx
Connected to: Raspberry pi 3B
For setup: https://youtu.be/j7JfQXTf16U
Print Settings
Printer:
Creality Cr-10 Rafts:
No Supports:
Yes Resolution:
0.2 Infill:
10 Notes:
Supports settings:
Support pillar resolution: 2.5mm
Max overhang angle: 65 Degrees.
PRINT:
NOTE: When using S3D slicer you must do: Mesh -> Separate Connected Surface
Otherwise you will get a hollow bits. -
CR-10 Leveling knob attachment 3D Print Model
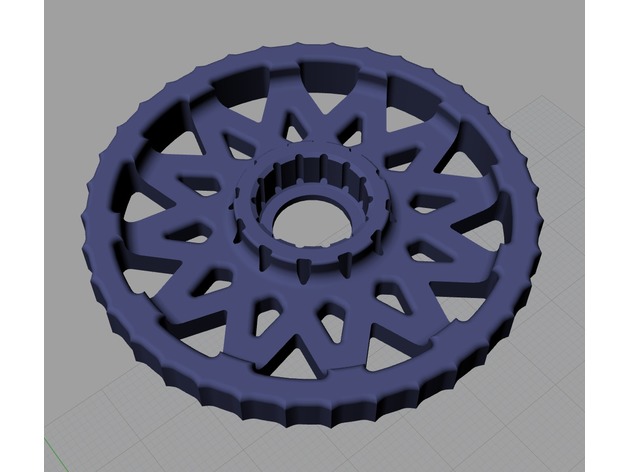
Summary
Hi everyone, I just made leveling knob attachment for CR-10 which name is LOTUS. Because I didn’t like the old thing at Thingiverse. It looks like some kind of wooden wheels of 15C.
Anyway, I don’t own CR-10 yet. lol
How I Designed This -
CR-10 Flexion bracket 3D Print Model
Summary
This is a bracket to let you put a flexion extruder on your CR-10. -
Creality CR-10 Fan Mount by SmilingImpact 3D Print Model
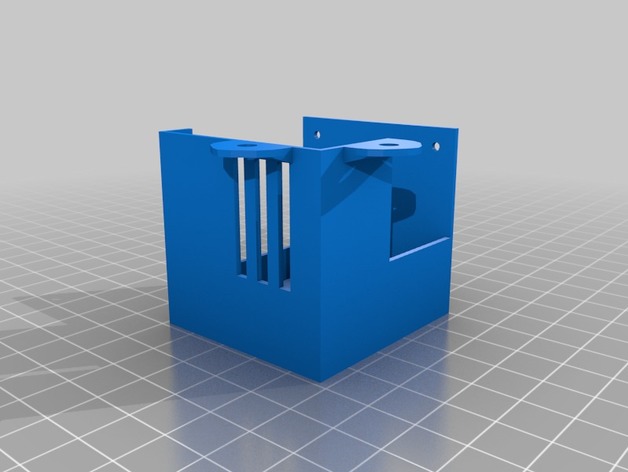
Summary
Virtually the same basic fan mount that shipped with the printer just not as electrically conductive!
Created with blender.
Print Settings
Supports:
Yes Notes:
It will need supports for the outer two screw tabs.