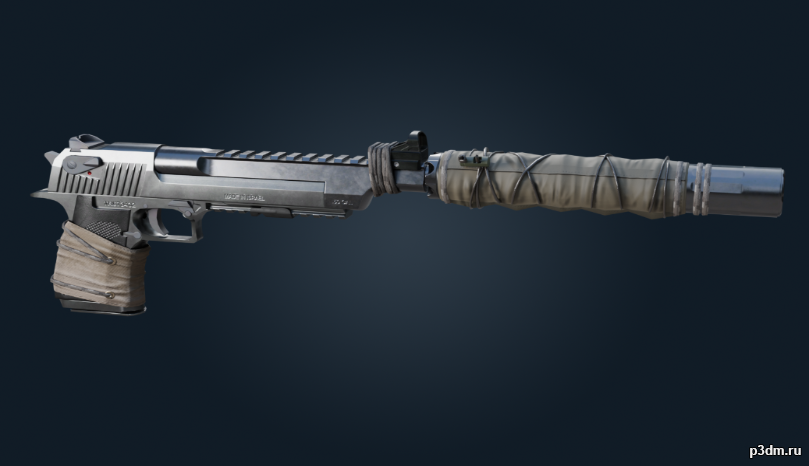
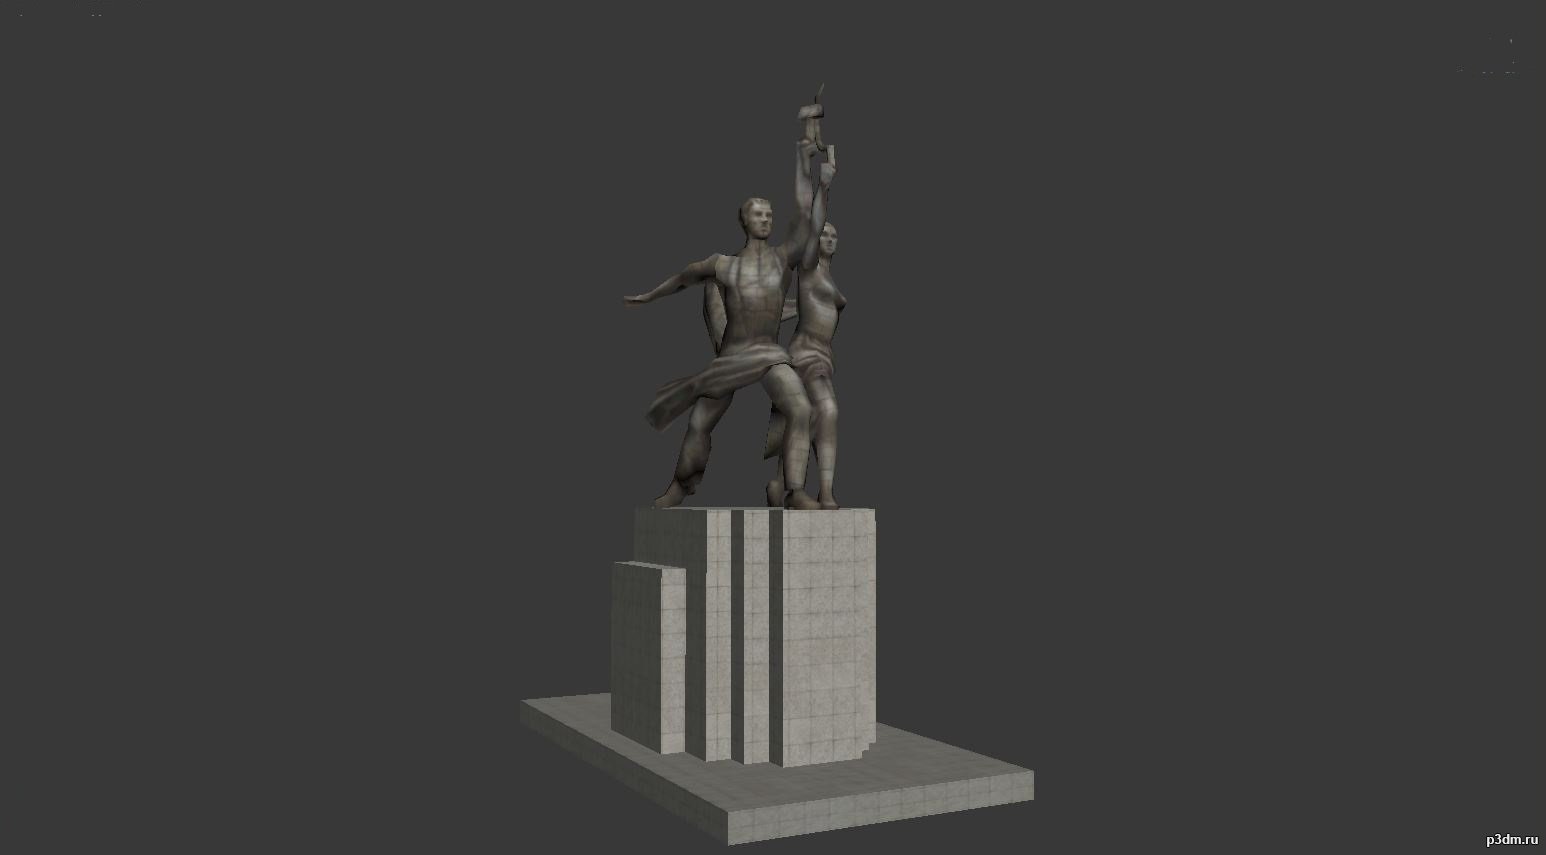
Рабочий и Колхозница из игры Адреналин 2: Час Пик.Format: FBXTextures: DDS
Tag: and
-
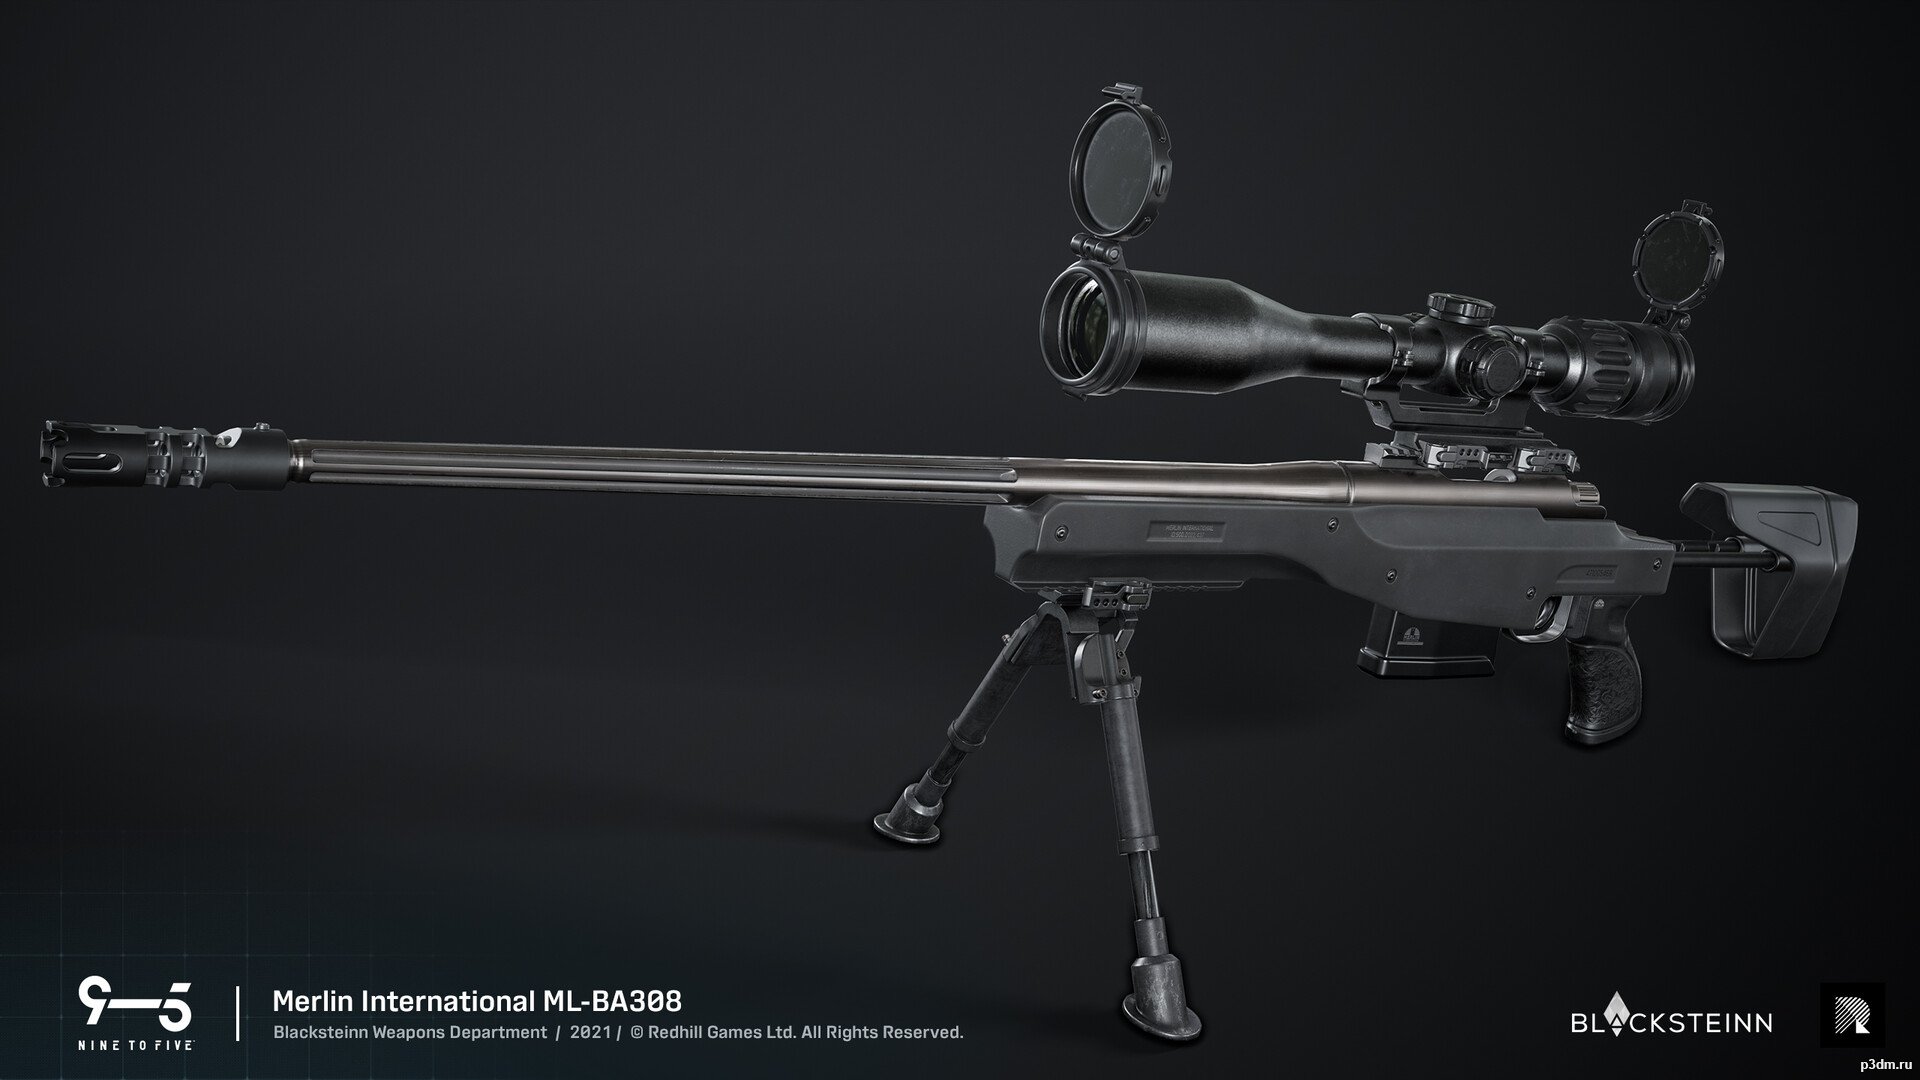
all nine to five weapons and attachments 3D Model
All weapons and attachments from nine to five modeles are actualy .gltf 2.0 bin but cant pick that ;/
-
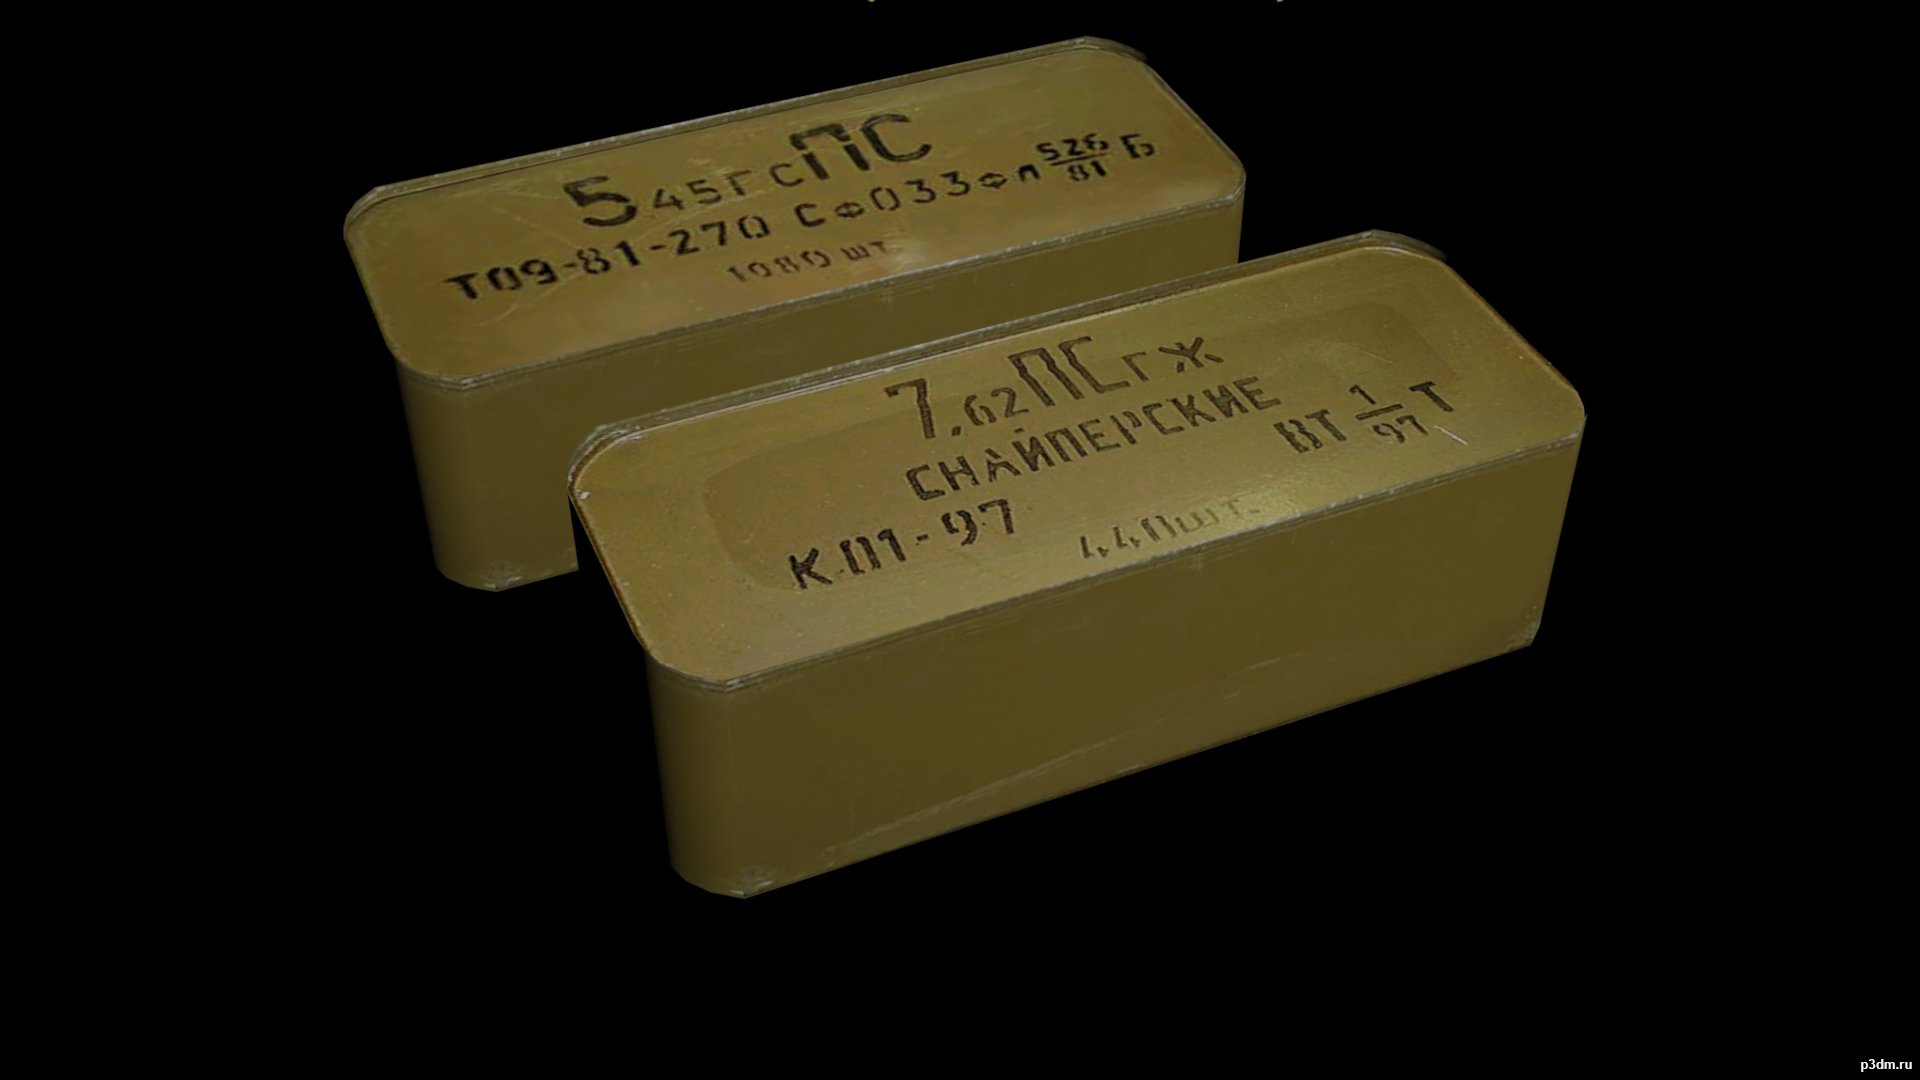
Zinc (box) for cartridges 5.45×39 and 7.62×39 3D Model
3D цинк (анбоксинг) патронов к автомату Калашников 5.45 и снайперской винтовки свд 7.62.Времен СССР 1981-97 годовТекстуры с реальных фото цинков СССР 1981-97,сжатаяD5 с альфой и не сжатая dds+TIF, хотя пришлось текстурировать один хрен. Под дно подготовил часть текстуры но невоспользовался(перекрыто боковиной как делал вначале).Открывашку делать не стал, думаю мне оно не надо, а кому надо сделают сами или обратятся с прозьбой.Адаптированно под игру STALKER-Тени Чернобыля. Тест(формат.ogf) на базе -meshesweaponsammoammo_762x39_ap и ammo_545x39_apШейдеры и звуки оружия метала. Полигон 1 цинка: 602Sidedzinc (unboxing) cartridges for the Kalashnikov 5.45 assault rifle and the SVD 7.62 sniper rifle. USSR times 1981-97Textures from real photos of zinc USSR 1981-97, compressed by D5 with alpha and not compressed by dds + TIF, although I had to texture one horseradish. Under the bottom, I prepared a part of the texture but did not use it (it was blocked by the sidewall, as I did at the beginning).I didn’t make an opener, I think I don’t need it, but whoever needs to do it themselves or apply with a request.Adapted for the game STALKER-Shadows of Chernobyl. Test (.ogf format) based on -meshesweaponsammoammo_762x39_ap and ammo_545x39_apShaders and metal weapon sounds. Polygon 1 zinc: 602Sided
-

box ammo 5.45 and 7.62 (USSR 1981-97) 3D Model
Погуглил вроде нет никде такой модели. Почему в игре STALKER нет такого короба(цинка) с патронами, наверно россыпью по карманам в зону попадали, ха,ха,ха.Ну и захотелось побыстрому слепить примитив.3D цинк (анбоксинг) патронов к автомату Калашников 5.45 и снайперской винтовки свд 7.62.Времен СССР 1981-97 годовТекстуры с реальных фото цинков СССР 1981-97,сжатаяD5 с альфой и не сжатая dds+TIF, хотя пришлось текстурировать один хрен. Под дно подготовил часть текстуры но невоспользовался(перекрыто боковиной как делал вначале).Открывашку делать не стал, думаю мне оно не надо, а кому надо сделают сами или обратятся с прозьбой.Адаптированно под игру STALKER-Тени Чернобыля. Тест(формат.ogf) на базе -meshesweaponsammoammo_762x39_ap и ammo_545x39_apШейдеры и звуки оружия метала. 2SidedGoogled like there is no such model anywhere. Why is there no such box (zinc) with cartridges in the STALKER game, probably they fell into the zone in bulk in pockets, ha, ha, ha. Well, I wanted to quickly blind a primitive.zinc (unboxing) cartridges for the Kalashnikov 5.45 assault rifle and the SVD 7.62 sniper rifle. USSR times 1981-97Textures from real photos of zinc USSR 1981-97, compressed by D5 with alpha and not compressed by dds + TIF, although I had to texture one horseradish. Under the bottom, I prepared a part of the texture but did not use it (it was blocked by the sidewall, as I did at the beginning).I didn’t make an opener, I think I don’t need it, but whoever needs to do it themselves or apply with a request.Adapted for the game STALKER-Shadows of Chernobyl. Test (.ogf format) based on -meshesweaponsammoammo_762x39_ap and ammo_545x39_apShaders and metal weapon sounds. Polygon 1 zinc: 602Sided
-
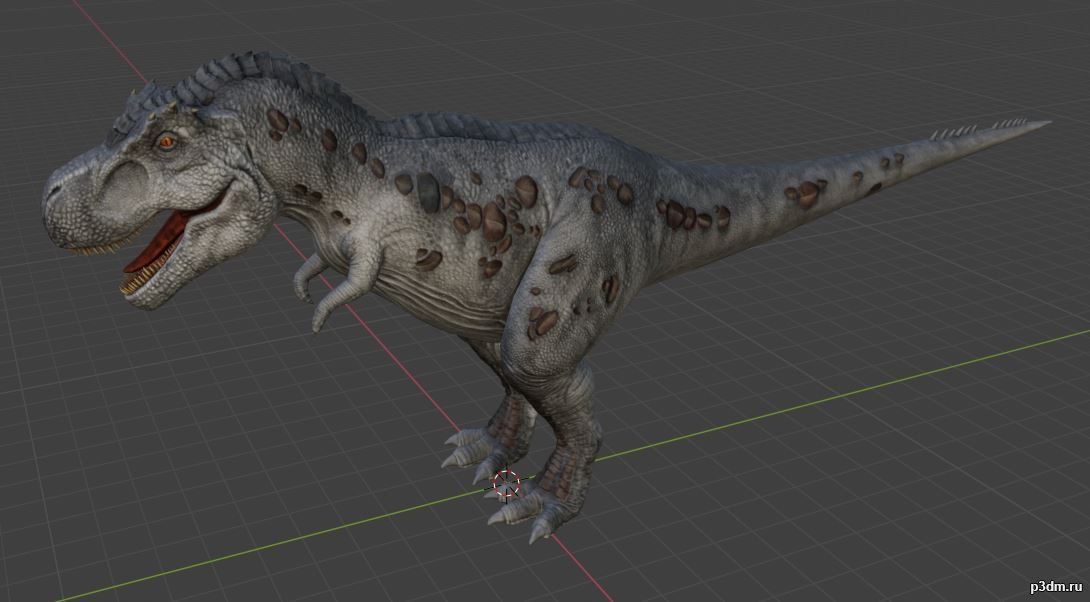
Rex (Old, New, Skeletal, Saddle and all Animations) 3D Model
Added all types of the Rex (New, Old, Saddle, Tek and Skeletal) with all animations
-
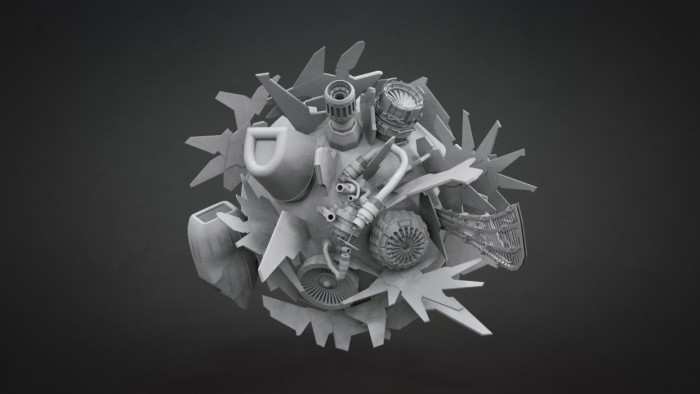
Engines and Wings Free 3D Model
This download includes an IMM Brush created for Zbrush 4R6 (compatible with R5) and is made up of 39 individual Mech Parts in addition to the original 39 x .OBJ files and 1 x .ZTL that can be downloaded.
-
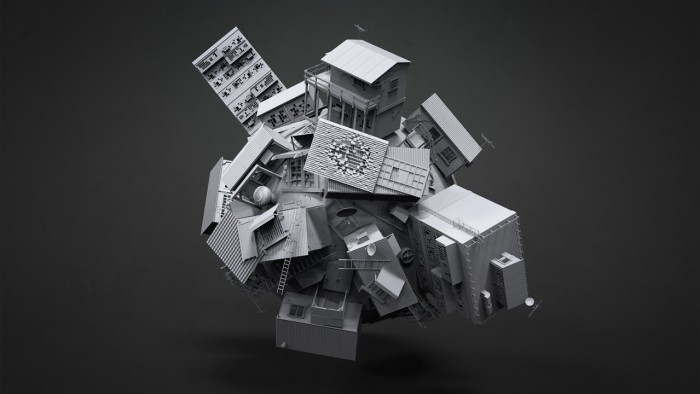
Building and Slum Set Free 3D Model
This set contains 56 Buildings and parts in the form of an IMM Brush created for Zbrush 4R6 (compatible with R5 and R7), the original .OBJ files and a single .ZTL are also included.
-

Office Table (pre war, second hand and after war) 3D Model
Office table from pre war, second hand and after war in the game of “Fallout 4”.
-
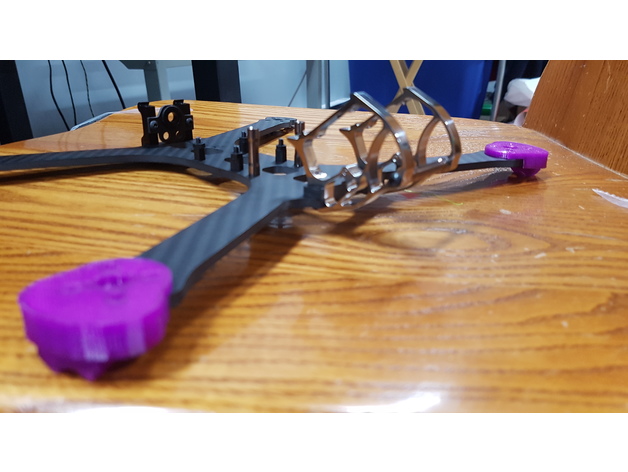
Armattan Chameleon Ti – Arm and soft Motor mount / landing gear 3D Print Model
Summary
this an flex protection for the end of the arm and btw , soft mount for your motor and landing gear
Print Settings
Rafts:
No
Supports:
No
Resolution:
.15
Infill:
45
Notes:
print in tpu -
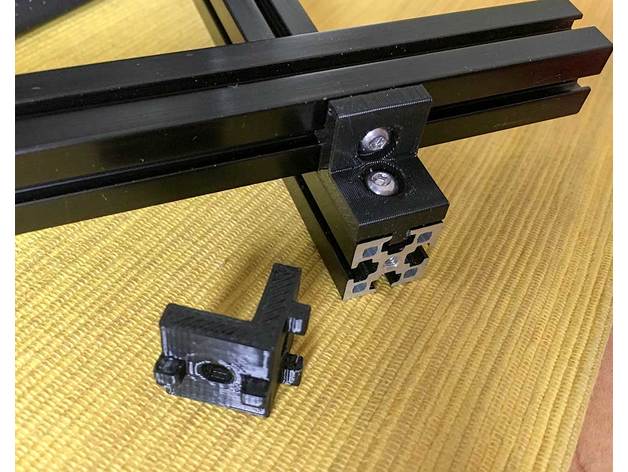
Compact 90 straight and cross for 15×15/OpenBeam/Makerbeam XL 3D Print Model
Summary
This is a compact 90 degree brace for Openbeam/Makerbeam XL 15×15 extrusion. There are two versions – one is a straight 90, the other is a very handy 90 degree rotated variant so you can do crossovers. The crossover version is pictured in the as-built photo.
A couple of things make this design different than the numerous other corner braces out there. This one has channel grooves to keep the part stable, which makes for a really nice, sturdy brace. I also did countersunk holes to make for a nice clean installation.
You do need to print this with supports but cleanup isn’t bad.
Print Settings
Printer Brand:
LulzBot
Printer:
Mini
Rafts:
No
Supports:
Yes
Resolution:
Any. I did 0.3mm
Infill:
20%
Notes:
Supports are required. Rotate the part so it sits flat. -
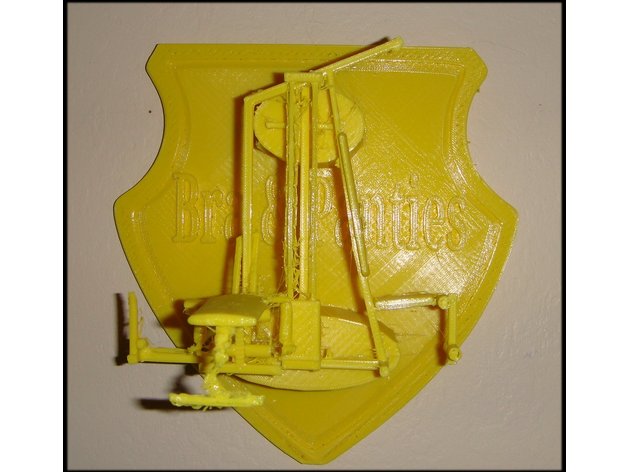
Exercise Gym Bra and Panties hook 3D Print Model
Summary
As far back as I can remember, every girlfriend I’ve ever had has had the habit of hanging their bras and panties on my exercise equipment. When I complained about it, they would always say something like “Well, you never use it!”.
Anyway, so I got this idea: Why not make a bra and panties hook that looks like exercise equipment? I mean it just seems like women would naturally gravitate towards using it for that express purpose.
Print Settings
Printer Brand:
Robo 3D
Printer:
C2 R2
Rafts:
No
Supports:
Yes
Resolution:
Fast (0.2mm)
Infill:
15%
Notes:
This thing needs a lot of support material so you might want to set your support density to 5 to 10% for easier clean-up.
Post-Printing
Mounting on the wall
Just hang it on the wall using the mounting hole in the back.
How I Designed This
Credit goes to….
I got the exercise gym model here:
https://free3d.com/3d-model/big-gym-1571.html
The wall mount I got here:
https://www.thingiverse.com/thing:387890
Thanks Geoffro
I put them all together with TinkerCAD -
![Mr Poopybutthole! [Rick and Morty] 3D Print Model](https://3dhunt.co/static/2018/05/665a0eca6b9cb903b738c6c94f4990d0.jpeg)
Mr Poopybutthole! [Rick and Morty] 3D Print Model
Summary
Watch here for more information: https://youtu.be/pfs3QbhC05g
It’s time for more Rick and Morty! This time up we have Mr Poopybutthole.
Modeling Software: ZBrush
Hollowed in Meshmixer
Supports in XYZWare Nobel
Slicer: Cura Moai Edition
Printer: Peopoly Moai
After modeling and printing, Chelsey worked her magic with the post processing. She filled the holes with wood filler. Then she went around fixing the support marks with wood filler for divots and a file for bumps. After that she primed him and used acrylic paints with paintbrushes to paint him. -
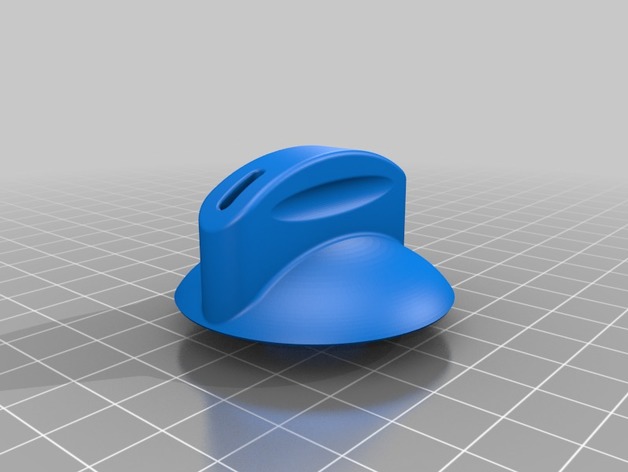
Washer Dryer Knob for GE and maybe others 3D Print Model
Summary
As they are wont to do, the knob on my dryer broke! The design is pretty weak, so I made a stronger and more stylish one! It will fit on Most GE dryers that have a 6mm diameter knob shaft. (the ones that have a cut out on one side of the shaft)
Print Settings
Rafts:
Doesn’t Matter
Supports:
Yes
Resolution:
0.24mm
Infill:
35%
Notes:
The infill needs to be a little higher than normal, at least 35%, so that it won’t collapse the walls when turning it. Maybe increase wall shells to 1 above normal. -
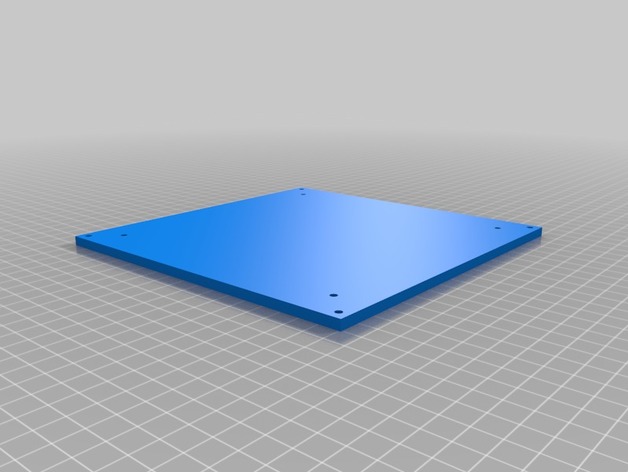
469A001G01 – Hot Plate and stir bar system 3D Print Model
Summary
Designed around an ardiuno Uno and a random motor I found. Takes a standard 200×200 mm heated PCB and insulates it from the stir bar assembly. Code in progress to drive all of it, but wanted to get the solid models available in the interim. -
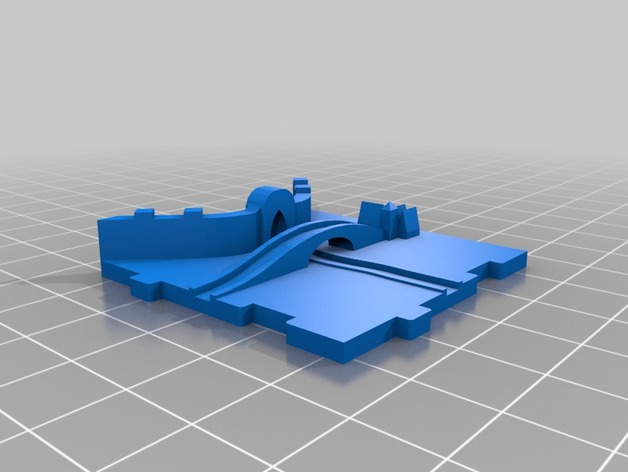
Carcassonne Traders and Builders Expansion Tiles 3D Print Model
Summary
Remixed using Solidworks.
These are the extra tiles needed for the Traders and Builders expansion for Carcassonne. (Some of the T&B tiles are identical to those in the base game so they aren’t included in this Thing).
I left out the ribbon/barrel/wheat symbols on the tiles because I think that rule is lame…
If you want to play with that rule, I’d recommend adding simple shapes to the tiles in Tinkercad to represent the symbols.
Print Settings
Notes:
I printed at 85%, this way the game doesn’t spill over every table we play on 🙂
The OG meeples will work with this size but it’s a little tight, I chose to print smaller meeples that make playing easier.
Post-Printing
Prime with black, paint to preference, matte clear coat gives great finish and protection to these pieces . -
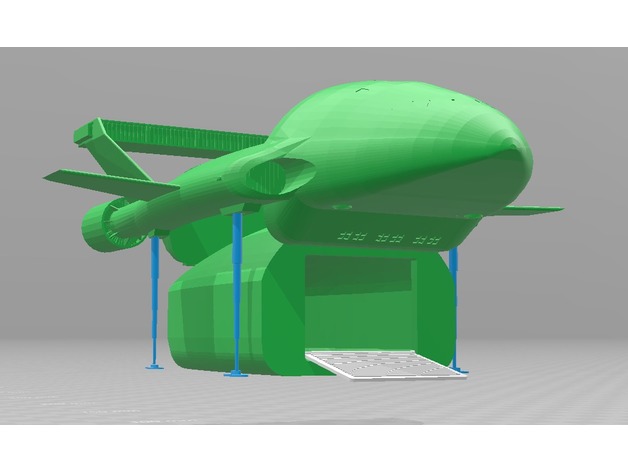
Thunderbird 2 and Pod 3D Print Model
Summary
This model is an updated version of my TB2 Pod (https://www.thingiverse.com/thing:1395981). This new version, however, does not use components from the (wonderful!) Thunderbird 2 model by Len Hickman; instead, it is a remix of my latest improvements to the one-piece model by Tobz. I split the model up for easier printing.
Note: the legs shown in the screenshots are not included in this “work-in-progress” release. These may be included in a future release.
Should print without support or raft. -
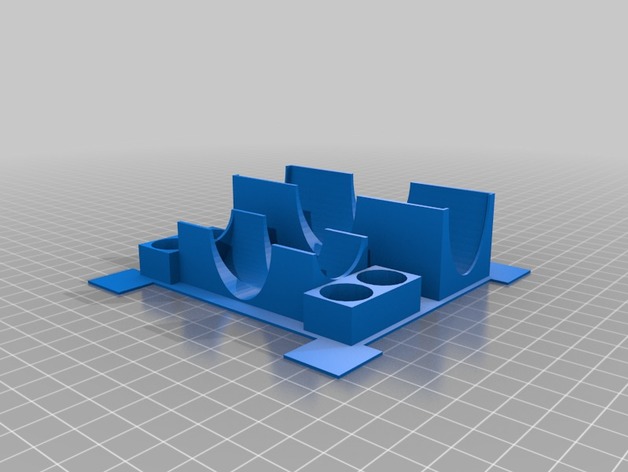
Magic Maze Pawn and Timer Holder 3D Print Model
Summary
This is a pawn piece and timer holder for the game Magic Maze. This piece is intended to compliment the modular insert style card/tile holders that fill quadrants of the original game box [https://www.thingiverse.com/thing:2654366] and replace the 4th open container. I’d caution that this holder only works well if the box is kept horizontal/upright. The pockets could be deepened but I opted for a design that minimized filament usage. You may need to trim the feet pads for best fit according to variations in the box size and according to your other modular inserts.
Print Settings
Printer:
Monoprice Maker Select Plus
Rafts:
Doesn’t Matter
Supports:
No
Resolution:
0.2 mm
Infill:
10% -
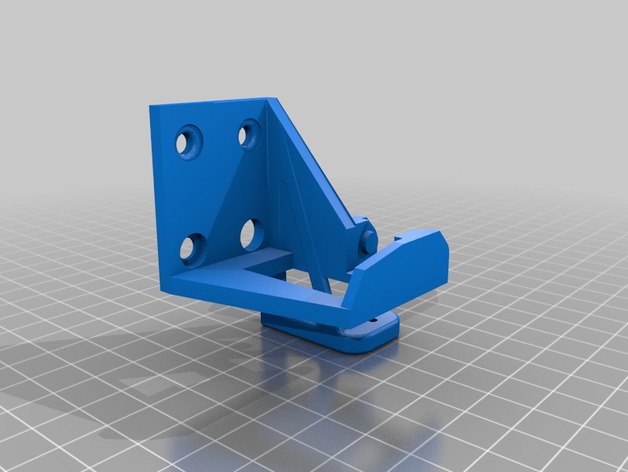
Anet A8 Extruder chain and BL touch mount 3D Print Model
Summary
Combined https://www.thingiverse.com/thing:2354864 and https://www.thingiverse.com/thing:2773637 so you can have a chain and the mount at the same time. -
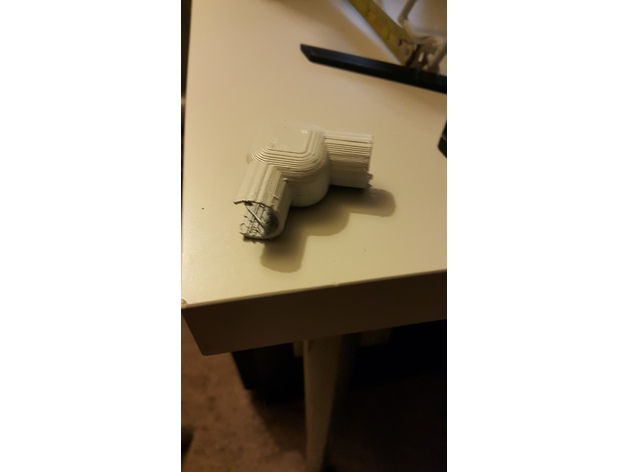
Corner Coupling for Lowes Peel and Stick Audio Cable Tubes 3D Print Model
Summary
Lowe’s Peel and Stick Speaker Wire Tubes are great and come with a straight alignment coupler but need a corner piece. This will fit their standard tubes. If unsure, print one and take it with you to Lowe’s or wherever and size it up.
Print Settings
Printer:
XYZ Davinci 1.0 Pro
Rafts:
Doesn’t Matter
Supports:
Yes
Resolution:
.3
Infill:
35 -
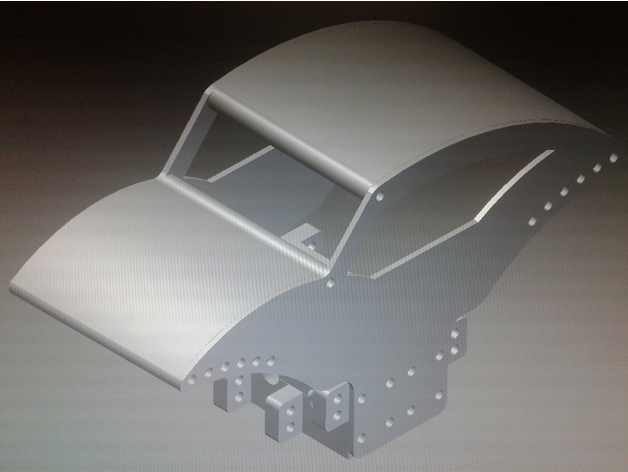
Sumo Micro Crawler Spider Chassis and Transmission 3D Print Model
Summary
Sumo Micro Crawler Spider Chassis with dual motor transmission. Able to use with other 1/24 axles including Losi Micro Crawler or Trekker. Assembly file is included for visual reference only, it wont work if you print that way! 🙂
Print Settings
Printer:
Monoprice Select Mini
Rafts:
No
Supports:
No
Resolution:
.0875 trans .21875 chassis
Infill:
85%
Notes:
This is my adapted Spider chassis so that you may use the trans I posted before. The chassis and trans were both adapted and fit together with 2mm bolts. Extra holes were made to mount links on trans and extra holes were made on chassis to allow the use of trans on forward or reverse. If using this chassis and transmission you no longer need to limit yourself to the sumo,it can also be used for losi axles as well or any other axles you may want to use. -
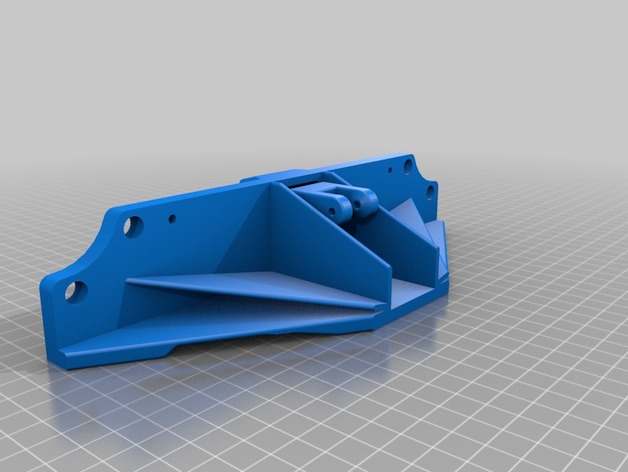
Anet A8 Belt Tensioner and Brace Y-Axis 3D Print Model
Summary
ANET A8 BELT TENSIONER and BRACE Y-Axis
We added this one so people in the community could provide feedback. When we finalize the model we will publish the final version.
The nut traps are very tight. Position the nuts in front of the traps and then use the 12mm screws to draw them in.
When the belt is taught – thread lock can be added to the nut/bolt to secure it in place.
Parts List
1 – Idler Pully 16 Tooth M3 Bore (Purchase Here)
1 – M5 x 12mm Bolt (Purchase Here)
1 – M5 Nut (Purchase Here)
1- M3 x 25mm screw
1 – M3 Lock Nut (Purchase Here)
4 Feet – GT2 Timing Belt (Purchase Here)
Digital Sqrt is an open source company and we strive to make all of our files available to all. The STEP and STL files are in the Thing Files folder.
Change Log:
3/14/2018 – Upload Files for comment by the comunity -
Discone Antenna Hub 400MHz and up, 70cms, ADS-B 3D Print Model
Summary
The Discone antenna is remarkable in that it is capable of receiving and transmitting over a wide range of frequencies with good matching. Because of this, it is a good match for SDR receivers such as the popular RTL-SDR sticks.
The only really tricking thing about making a discone is that the disc has to be balanced at the very top of the cone, which is mechanically awkward.
The two parts here allow the cone to be solidly clamped and provide an adequate base for the disk. There also two holes for bring the coax centre and braid out to the disc and cone.
The base part has a socket at the bottom for 25mm (1 inch) plastic conduit for mounting
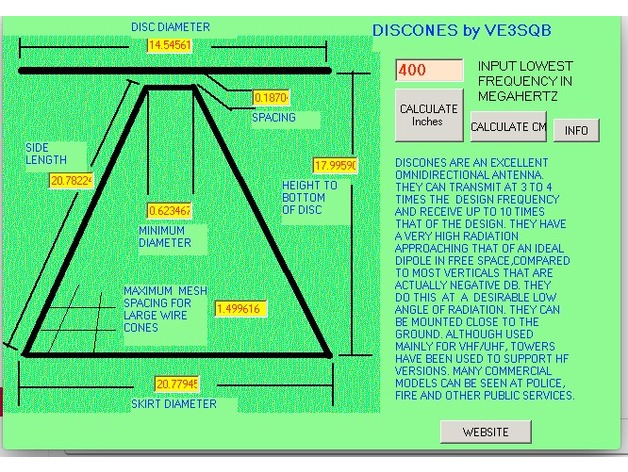
This antenna illustrated is designed for 400MHz and up, and as such transmits well on the 70cms amateur band, US and UK PMR channels and 23cms. It also receives aircraft ADS-B signals very well. I used .3mm plastic sheet for the cone and 2mm plastic for the disc, and then covered them with aluminium weatherproof tape. Be sure to check for continuity across the tape stripes.
The screenshot is of a calculator by VE3SQB which can be downloaded from http://www.ve3sqb.com/ if you want to make attenna’s for other ranges. -
Delta 5 – with voltage regulator and heat sink 3D Print Model
Summary
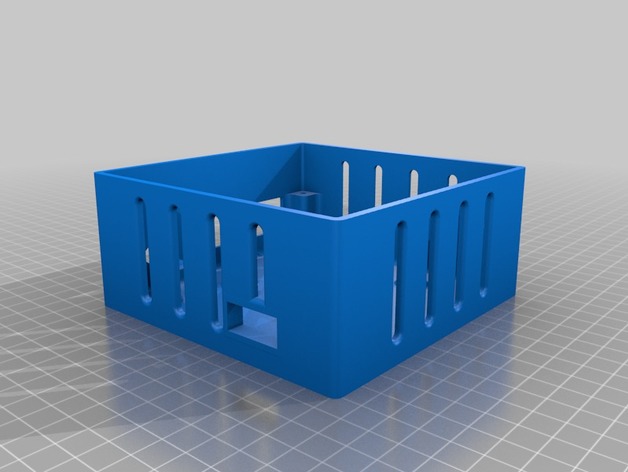
Just trying to add a voltage regulator, and some heat sinks I bought 😀 -
INDUCTIVE SENSOR RACK AND PINION – DRAKON EXTRUDER BODY 3D Print Model
Summary
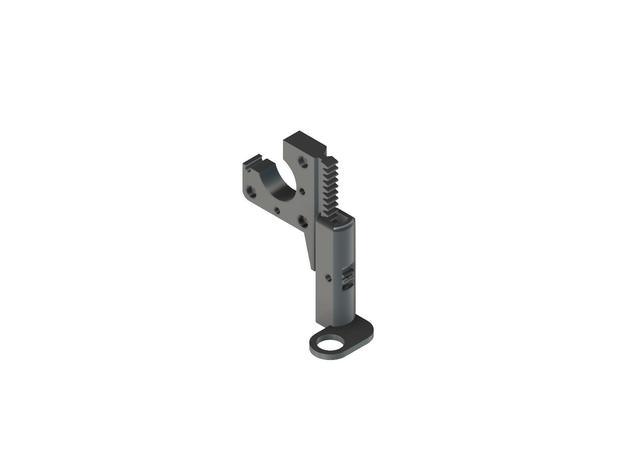
THIS IS A MANUAL ADJUST SENSOR CARRIAGE FOR AUTOMATIC BED LEVELING.
-THE MAIN PROBLEM I HAVE WITH AUTO LEVELING WAS THAT SOME TIMES MY BED (MADE OF 3MM PLYWOOD) WOULD POSSIBLY WARP.
-ANOTHER POSSIBILITY IS THAT MY X_AXIS WOULD FLOAT OFF OF THE LEAD SCREW A LITTLE BIT IF I DIDN’T PRE-HEAT BEFORE I AUTO LEVELED.
-THIS ALWAYS MEANT I HAD TO REDO ALL THE ADJUSTMENTS BETWEEN THE X-AXIS AND THE SENSOR HEIGHT. I ALSO NEVER QUITE LIKED THE ADJUSTMENTS IN AVAILABLE IN THE FIRMWARE REGARDING SENSOR HEIGHT.
-THAT IS POINT OF THE RACK AND PINION CARRIAGE FOR THE SENSOR. TO DECREASE TIME SPENT ADJUSTING ANYTHING MECHANICALLY AND IN THE FIRMWARE/SOFTWARE.
-DECREASING THE WEIGHT AND SIZE WAS ALSO MY GOAL, TRYING TO KEEP THE SENSOR AS CLOSE TO THE NOZZLE AS POSSIBLE.
THE PINION HAS A PRESS FIT INNER DIAMETER THAT SHOULD STAY IN ITS PLACE PRETTY WELL AN IF THERE IS ANY MOVEMENT I ADDED A HOLE FOR INSERTING EPOXY TO REALLY STICK THE GEAR TO THE BOLT.
HARDWARE USED* [NOT INCLUDING ALL HARDWARE USED WITH THE DRAKON MOUNT ITSELF]
1- 4MM X 16MM WINGED BOLT (I IMPROVISED ON THIS MYSELF WITH A WING NUT AND A BOLT, USING PLIERS)
1- 4MM LOCK NUT
THERE IS A TOOL ADDED THAT IS USED TO HOLD THE GEAR IN PLACE AGAINST THE RACK WHILE YOU THREAD THE BOLT THROUGH THE GEAR TO KEEP IT FROM MOVING. -
TronXY X1 Control Box and base V2 3D Print Model
Summary
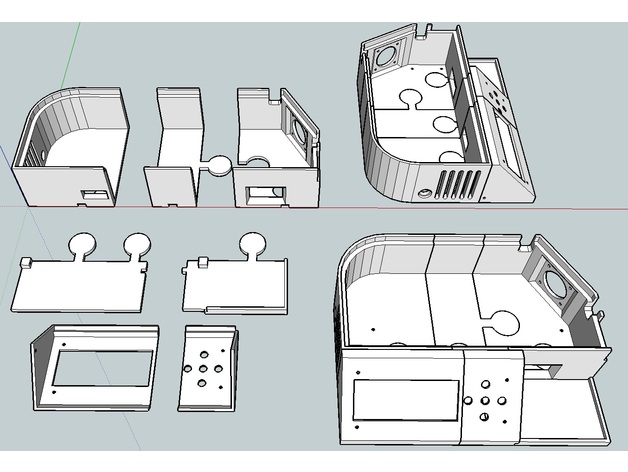
all you guys and gals out there that are mad they now have to print a new better set you can blame (thank) Rob Zarfas from the FB “Tronxy X3, X1, X5 3D Printer Users (All models)” group
it was his suggestions and ideas that helped me draw this up
there are over 100 changers (i stopped counting at about 85)
in general its more compact and a better fitting unit
i have now printed this as yet but all the dimensions should work
Print Settings
Supports:
No
Resolution:
0.2mm
Infill:
30
Notes:
1.2 wall (0.4nozzle 3 wall thick)
0.8 bottom and top (4 layers at 0.2mm) -
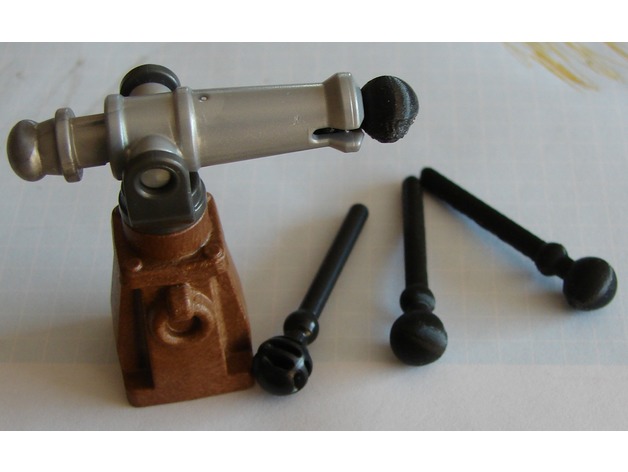
Playmobil Small Pirate Cannon Sticks and Bullets 3D Print Model
Summary
This re-design for my son’s small Playmobil pirate cannon.
After 20 minutes only he had lost 2 of the 3 original ones that came with the cannon.
Before the last one was also gone I redesigned it and printed a few more out.
First I used a square to remove part of the item with a square in the openSCAD code to obtain a flat side and print it out easily.
But the stick/bullet had to be inserted with the flat area to the side, or it would not fly good enough.
So I removed the square and printed it with supports.
Does not look perfect, but works better.
I did not dare to print it vertically…
You may modify the design to do so.
Print Settings
Printer:
Anycubic I3 Mega (Ultrabase)
Rafts:
Yes
Supports:
Yes
Resolution:
o.1
Infill:
100% -
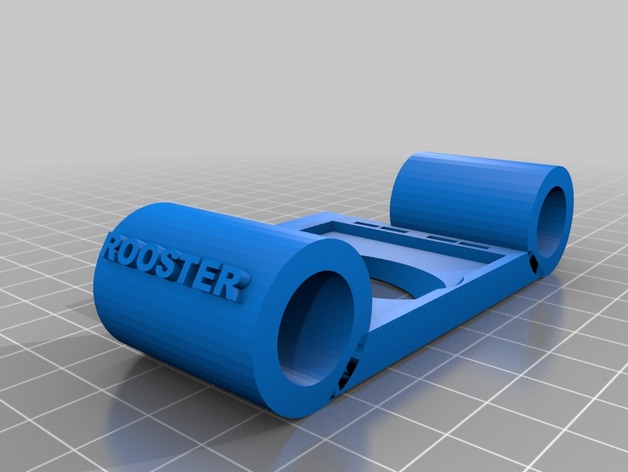
Caps Mount air duct for Armattan Rooster and Raceflight Bolt. 3D Print Model
Summary
This was designed for the Fighting Rooster build.
YouTube https://youtu.be/A_-5wU9x08k
Print Settings
Printer:
Custom
Rafts:
Doesn’t Matter
Supports:
Doesn’t MatterPost-Printing
How I Designed This
-
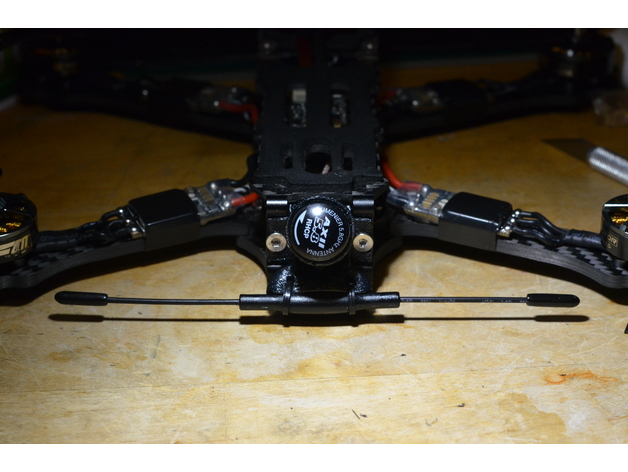
TBS Crossfire Immortal T and AX II Armattan Rooster Mount 3D Print Model
Summary
Mount utilizes TBS unify pro sma mount, AX II antenna, and Immortal T crossfire antenna. Extremely durable and low profile -
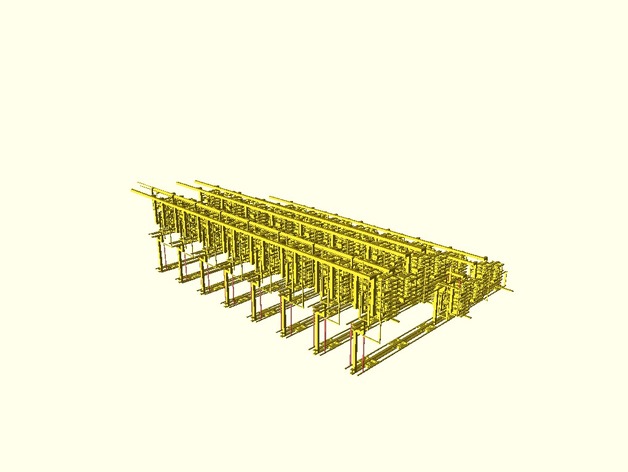
full register and buss 3D Print Model
Summary
this is the full register and buss, each register of the processor will use this component.
http://www.imm.org/Reports/rep046.pdf
the scad file also contains the other components that have been uploaded previously.
t.
Eventually i intend to parameterize the file and make it animatable but my current skill level with open scad is rudimentary at best. -
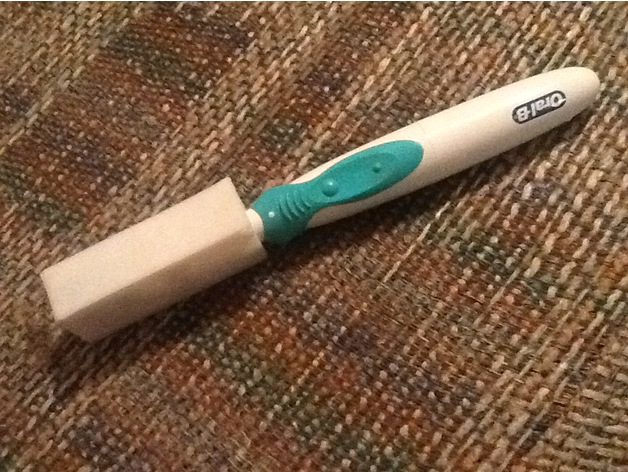
Oral-B Tooth Brush Cover and Wall Mount 3D Print Model
Summary
::::: Caution :::::: This item has a few very thin slice areas. Must be printed with no more than a .25mm height or thickness. Any thicker it will not print the hinges.
Print and then fold up the top and dab a bit of supper glue to firmly connect the top part of cover. The hinge will last a long time if the cover top is just snapped up and toothbrush removed. Flipping the cover up and all the way over will soon break it. Should not need blow drier for heat on the hinge. The other mount piece would be for mounting on a wall. Mount it and then use double stick tape on the cover.
Hope you enjoy. Happy printing !! 🙂 -
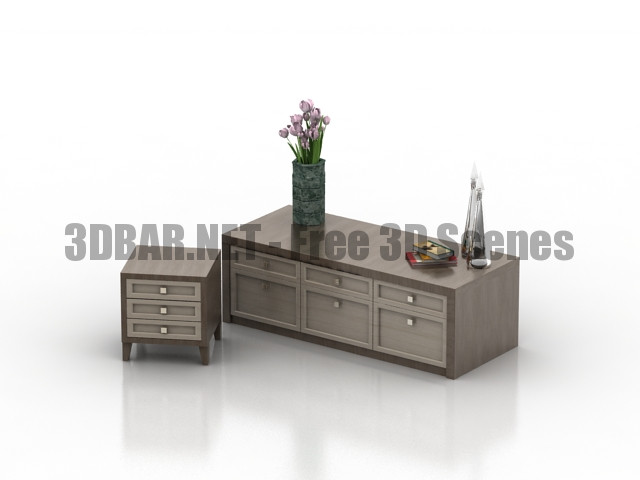
Locker nightstand decor vase and flowers 3D Collection
Locker nightstand decor vase and flowers 3d Models
-
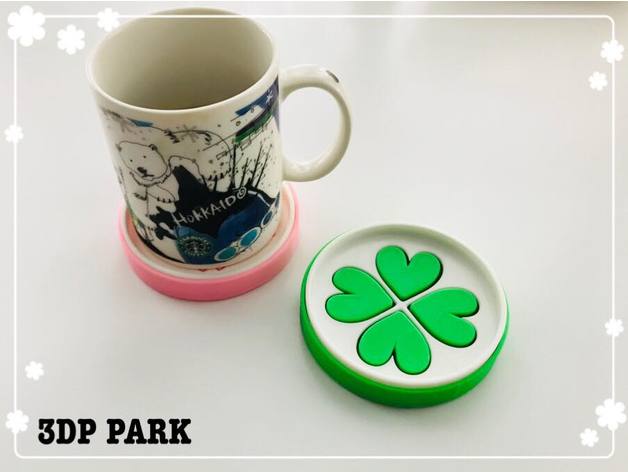
Lucky Clover Soap Box and Coaster 3D Print Model
Summary
Lucky Clover Soap Box and Coaster
Print Settings
Printer:
CR-8
Rafts:
Yes
Supports:
No
Resolution:
0.2
Infill:
10Post-Printing
How I Designed This
123D Design
-
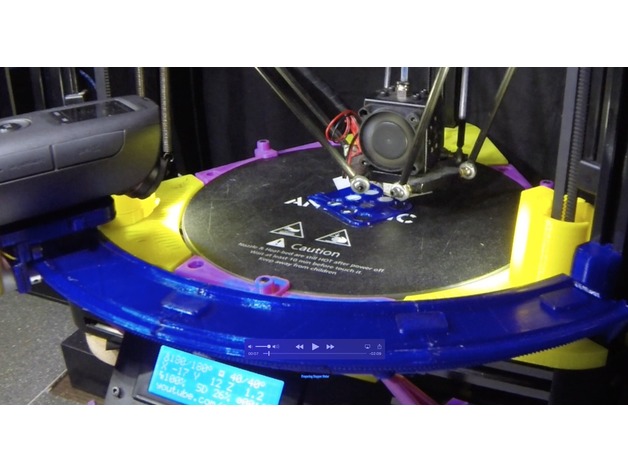
Video Timelaps Track And motorized Carrige 3D Print Model
Summary
This was a fun project to do and im going to share it with you. its a track that fits the cossel delta style printers that have the 240 mm diameter hot bed. you could fit some feet to it and use it free standing too.
If anyone is interested in free standing stand for it let me know i will do some and add them to the files.
to build this project you will need the following items :
1 x Stepper motor BYJ48
3 x Ball Bearings 11 mm OD 5 mm ID
1 x Arduino Nano
1 x micro switch
1 x 10K potentiometer
all easily available online
I will be posting a series of videos on youtube showing how to make this and get it working including the arduino code to program it too.
link to videos https://youtu.be/3NT6WOhc9j0
so please support me by subscribing to my youtube channel and if you turn on the notifications you will know when im adding videos for this project.
any problems please leave your comments below. -
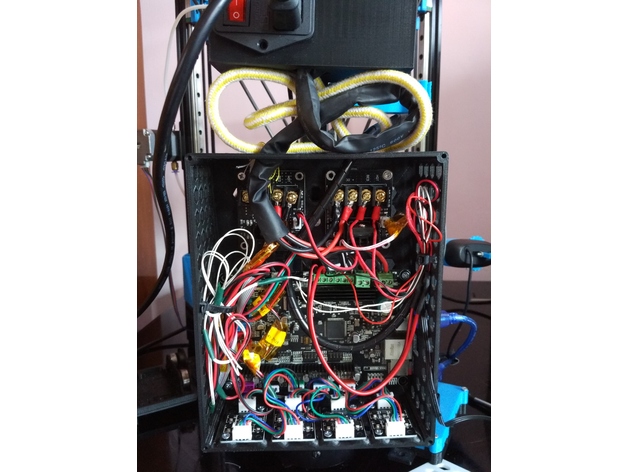
MKS SBASE 1.3 BOX include Dual Mosfet, Four TL-Smoother, and FAN 120mm and Bracket to Alumunium Profile 3D Print Model
Summary
This is MKS Sbase case the dimension is 200x160x63 need a larger printer to do that.
Support for dual mosfet and four TL Smoother
Cooling by 120 mm Fan
add three hole on center to mount to alumunium profile vertically
Print Settings
Printer Brand:
Prusa
Printer:
Prusa Clone
Rafts:
No
Supports:
No
Infill:
20 -
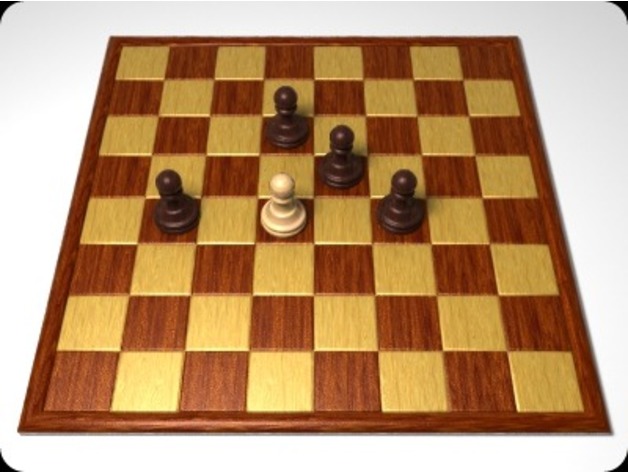
Fox and Hounds Board Game 3D Print Model
Summary
Fox and Hounds is played on a chess board or checkers board sized 8×8. 4 similar colored pawns or checkers as hounds and a single pawn or checker in other color as a fox.
Hounds are placed onto fields b8, d8, f8, and h8. Fox starts set onto e1. Fox moves first.
Hounds hunting the fox. The fox moves diagonally one field range forward or backward onto an empty adjacent square per turn. Hounds can only move diagonally one field forward (towards row 1) onto an empty adjacent square.
Since only diagonal moves are allowed the game is played on the 32 dark fields of the chess board only.
There is no capturing by jumping and no stacking of checkers. Neither by jumping the opponent as in Checkers nor by moving onto its field replacing the opponent.
Fox wins by reaching the other side of the board (8th row where hounds started their hunt).
Hounds win by blocking the fox such that it cannot move anymore (when fox has no legal move left).
If moving perfect then hounds will win.
I have 2 playing pieces for this game with dogs heads even though when I was growing up I plaid this with chess pawns. Enjoy. -
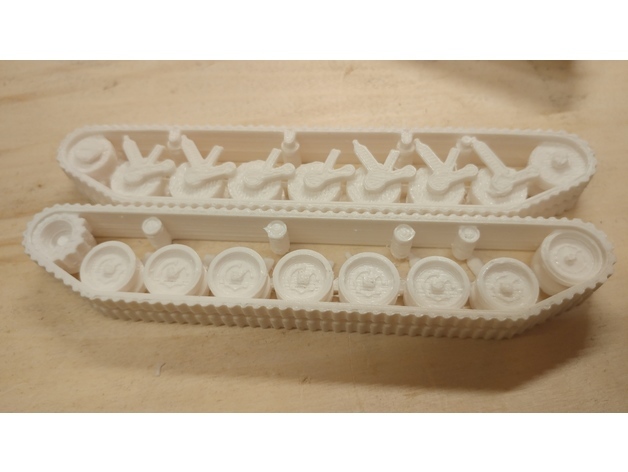
Leopard 1 split hull and tracks 3D Print Model
Summary
A simple remix of the Leopard 1 from TigerAce1945, with the tracks of the tank split from the hull for ease of printing. This uses the same turret as the original. Please go and look at his wonderful creations, they are works of art! -
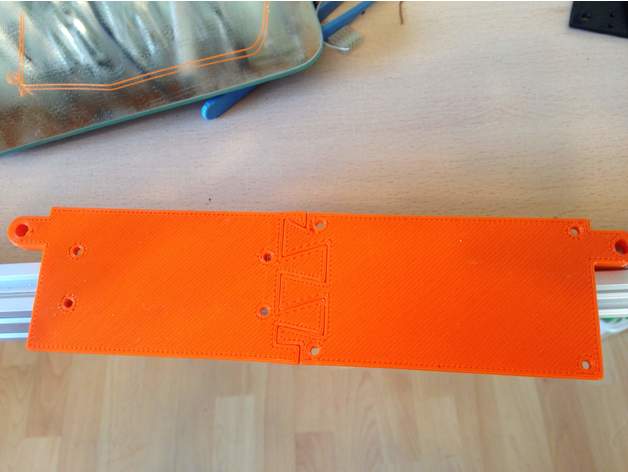
ManaSE Clon Base and Laser Support 3D Print Model
Summary
This is a support for mana se and TTL Power base for laser (i have one of 5W). -
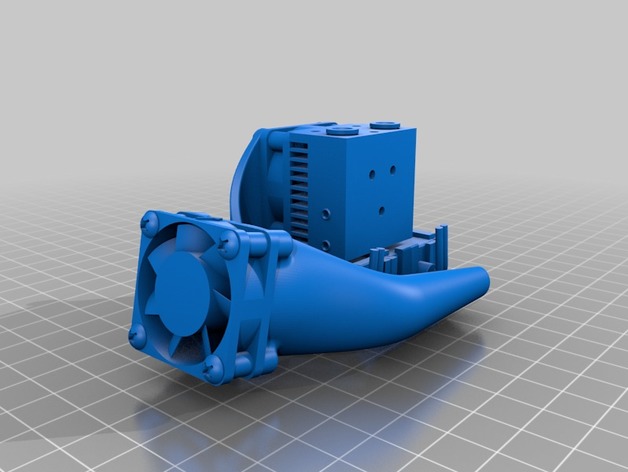
Filament Cooler Fan Shroud, Dual Side, E3D Chimera and Cyclops 3D Print Model
Summary
Dual side shroud designed for lightness, access, and easy installation on a E3D Chimera or Cyclops hotend.
Printed with PETG, standing on fan mount surface.
Print Settings
Printer:
Banana 3D 330 Rafts:
Yes Supports:
No Resolution:
<= 0.2 Infill:
70 to 100% Notes:
Instead of a raft, a brim may be used with good results.
Heater block “socks” provided by E3D with their chimera and cyclops extruders should be used to minimize heat loss from peripheral air flow. -
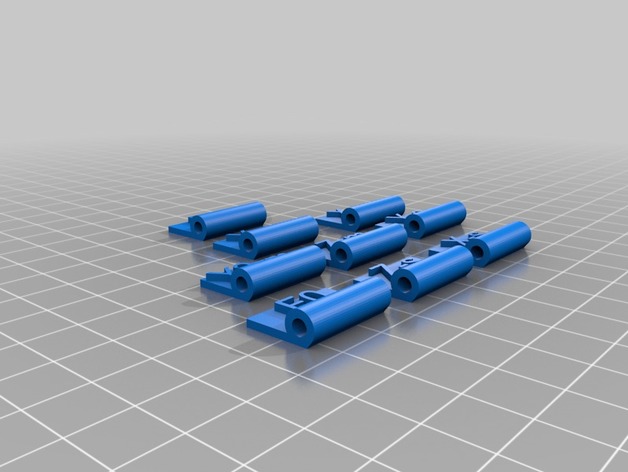
stickers For motors and End stop, Fan0 – Fan1 3D Print Model
Summary
stickers for motors and end stop -
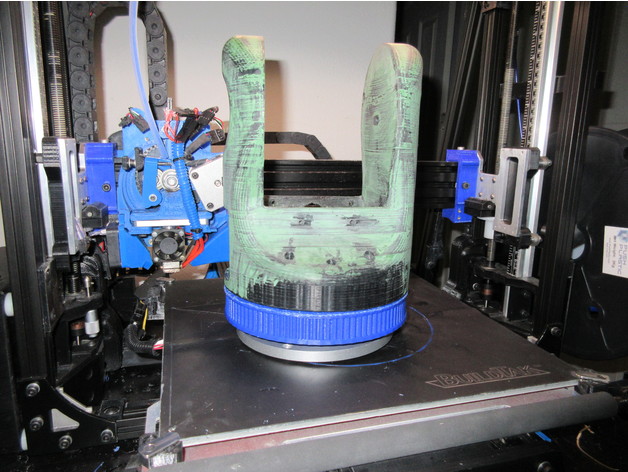
Turret Ring Slew Bearing base and main pulley for Moveo Robot Arm 3D Print Model
Summary
This is another modification based off of Labala’s excellent Moveo upgrade parts. This time I’ve bored out the main pulley for arm rotation and made a matching base for it. This uses an inexpensive 5.5″ (140mm) turntable bearing (I used this one specifically https://www.ebay.com/itm/1pc-new-5-5-140mm-Home-Hardware-Aluminum-Round-Lazy-Susan-Bearing-Turntable/122799616711?ssPageName=STRK%3AMEBIDX%3AIT&_trksid=p2060353.m2749.l2649) as well as 8 M4 trapazoid head bolts and nuts. 35mm – ish should work fine. You may need to go with phillips head ones in this instance to get proper countersink clearance.
Assembly instructions:
you will need the other half of the base, the motor mount, cover and belt tensioner from Labala’s project.
install the ring on the printed base, with the ring clearance extension down, make sure the bolts are tight. Consider using lockwashers here.
install the nuts in the pulley ring, and bolt it to the stock arm base using the stock bolts.
bolt the turntable slew bearing to the bottom of the pulley
Assemble the remaining base components.
Thats it, you now should have a robot arm you can bolt to a baseplate or something.
Future expansion plans will include some sort of mount for a 2 stage slip ring assembly (large outer 12 ring, smaller inner 24 ring maybe?
I’m printing the larger piece now, will post pictures when it’s done.
Print Settings
Printer Brand:
LulzBot Printer:
TAZ 5 Rafts:
No Supports:
Yes Resolution:
0.5mm nozzle, ABS (PLA might work better here) Infill:
15% infil, 7 shells. Notes:
This is going to require support for the mounting tabs and the slew ring recess. -
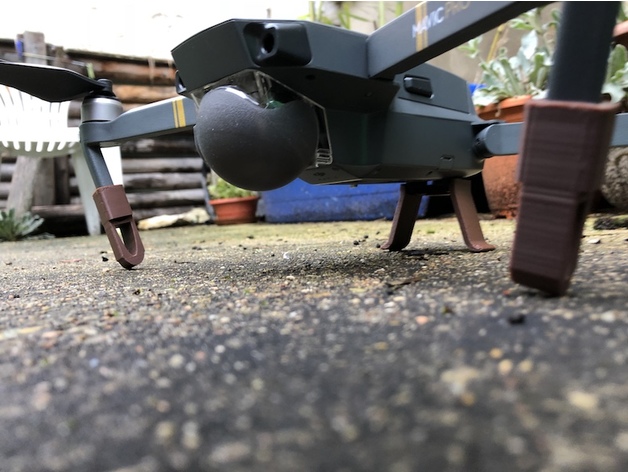
DJI Mavic Pro Foot L R and Rear Foot 3D Print Model
Summary
Foot extension for the drone DJI Mavic Pro.
No difference between right foot and left => front
and the back foot really easy to install…
Take off, landing by hand available on :https://cults3d.com/fr/modèle-3d/gadget/take-off-landing-by-hand-dji-mavic-pro
Print Settings
Printer Brand:
FlashForge Printer:
Creator Pro Rafts:
No Supports:
No Resolution:
0.18 -
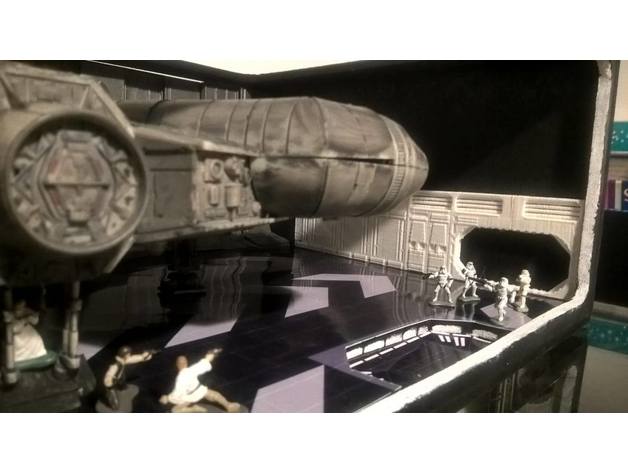
SCI-FI Movie SW – Collumm and Door 3D Print Model
Summary
Here are 4 parts that I make to put into my diorama.
Collumms, Wall, and Door from Death Star I from Star Wars: A New Hope.
Hope you enjoy.
Print Settings
Printer:
3D Clonner Rafts:
No Supports:
No Resolution:
0,250 Infill:
10% -
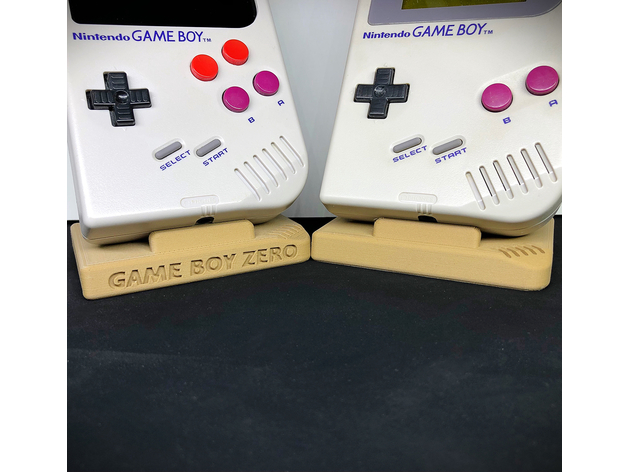
Game Boy Zero and Game Boy (DMG-01) Display Stands 3D Print Model
Summary
I made these for displaying my Game Boy (DMG-01) and Game Boy Zero collection. There are two versions: with and without “Game Boy Zero” text debossed on the front of it. Pretty happy with how it turned out!
You can purchase one printed in wood-fill PLA from here: http://market.sudomod.com/game-boy-display-stand/
For more Game Boy Zero and related stuff check out http://www.sudomod.com.
You can follow me on Instagram to see other things I’m working on: http://www.instagram.com/sudomod_wermy
Print Settings
Printer:
Raise3D N2 Rafts:
No Supports:
No Resolution:
0.15mm Infill:
15% Notes:
Woodfill PLA is my favorite material to use in printing these, but about anything should look nice. -
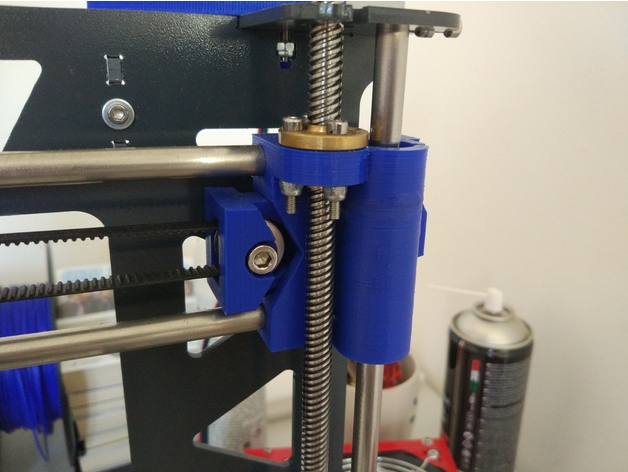
Prusa Steel X axis with tensioner and 8mm leadscrew support 3D Print Model
Summary
This X axis for the Prusa steel frame features a convenient single screw belt tensioner and supports 8mm leadscrews.
You need some M3 screws and nuts to mount the leadscrew nuts in place, a M4 screw and nut for the tensioner and a M5 screw and nut for the toothed idler, I use a cheap aliexpress toothed idler with a M5 bore.
Prints without supports.
Print Settings
Printer Brand:
Prusa Printer:
Prusa Steel Rafts:
Doesn’t Matter Supports:
No Resolution:
0.3-0.25 Infill:
25-30% -
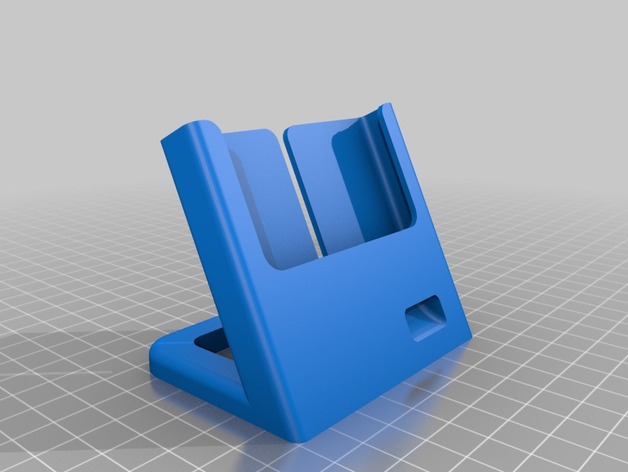
iPhone6 dock for Fairtec cable and Tech21 cover 3D Print Model
Summary
Created an iPhone6 dock that is compatible with Fairtec charging cable and Tech21 cover.
Print Settings
Printer:
Creality CR10 Rafts:
No Supports:
No Resolution:
0.2mm Infill:
20% -
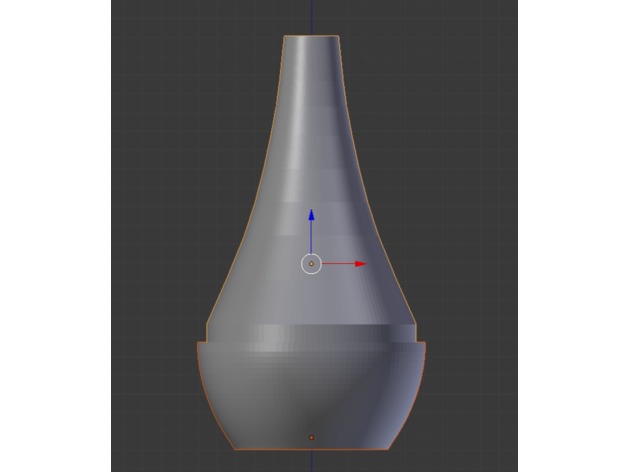
Trombone and Trumpet Mute 3D Print Model
Summary
Trombone and trumpet mute in 2 parts.
You can glue each part to another or drill one or two holes and use a screw.
This mute was made based on an image of a real mute.
The purpose of this mute is to make the volume lower. Use it to make your neighbors happy!
Print Settings
Printer Brand:
Ultimaker Printer:
Ultimaker 2 Extended Rafts:
No Supports:
No Resolution:
0.5 Infill:
40 Notes:
Trombone mute in 2 parts.
You can glue each part to another or drill one or two holes and use a screw.
This mute was made based on an image and size of a real mute.
The purpose of this mute is to make the volume lower. Use it to make your neighbors happy! -
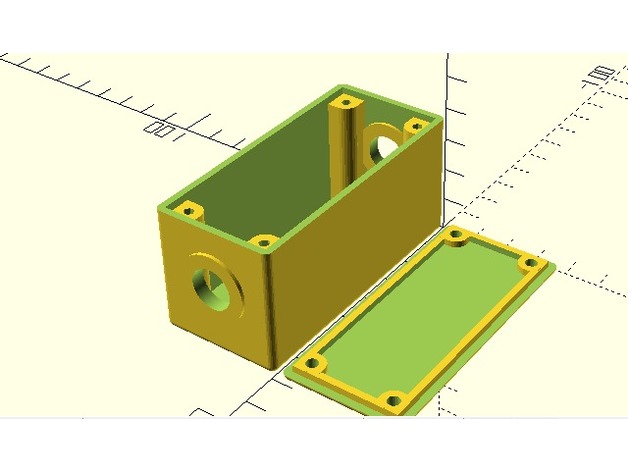
Customizable Project Box With Lid Screws and 2 Holes 3D Print Model
Summary
I added a couple holes in each end. I was going to put some barrel jacks in them. Go ahead and put whatever you want into those holes.
Print Settings
Printer Brand:
Prusa Printer:
i3 MK2S Rafts:
No Supports:
No Infill:
100 Notes:
ABS @ 230
bed at 80
100% infill
print speed 60
How I Designed This -
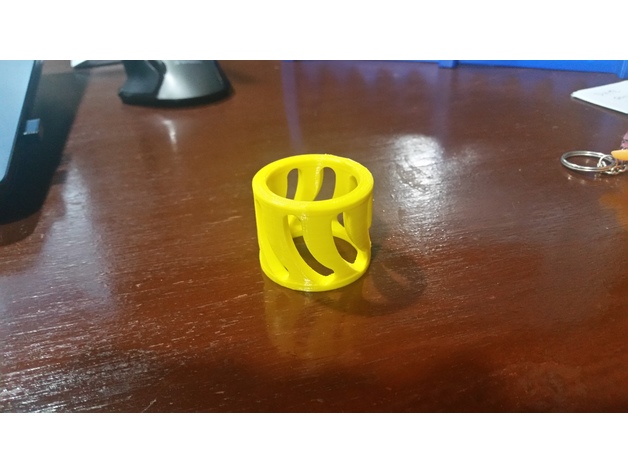
Cr-10 Spool Adapter and Spacer 3D Print Model
Summary
I didn’t like the way the spools rode on the shaft for the Cr-10, so I designed up this spool adapter. If you print one for each side of the spool, they fit over the shaft and inside the spool ID for a much better fit. This also ensures the nut holds the material on, without over tightening. Designed for the Inland 1.75mm 1Kg spools, but works for others as well.
I also recently picked up smaller test spools for glow in the dark and color changing material, and found they were thinner causing the adapters to walk out during printing, so I designed up a quick spacer to solve that problem as well.
Thanks,
Johnny Mac
Print Settings
Printer:
CR-10 Rafts:
Yes Supports:
No Resolution:
.1 layer thickness Infill:
25 Notes:
I used the raft to keep the spool flat against the build plate, but it would likely print without. PLA works fine as these take no load. -
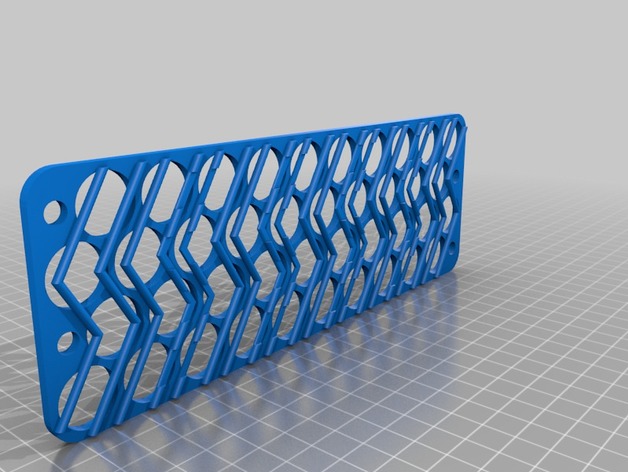
4s10p 18650 battery holder for 14.4 volt with 1/4 inch bolt holes and tab slots 3D Print Model
Summary
This is a 4s10p, 18650 battery holder for a 12 volts system (with a low voltage cutout and a DC-DC buck). Nominal voltage of 14.4 with a high of 16.8 volts. It holds 40, 18mm cells snugly.
I added a 1/4 inch bolt hole to bind everything together, mount to a case.
One of each file should be printed to get the tabbing and alignment correct. They’re labeled top and bottom, but they could be used the other way–top as bottom and bottom as top (or left side right side, etc).
Each staggered row should be tabbed down the middle with cells alternating anode – cathode – anode – cathode (in series) and bridged over the tabbing slots to the next row with the cells aligned the same as the previous (in parallel). If you don’t understand how this works, study up.
Built for my portable solar kit. -
The Walking Dead – Abandoned Bus and Police Car 3D Print Model
Summary
Some additional vehicles to litter your road ways.
I added an additional removable-roof version of the bus so you can hide zombies, loot or your heroes in it. There are some bus seats too to scale and print ! -
Prusa I3 Mk2/S Filament guide and light holder 3D Print Model
Summary
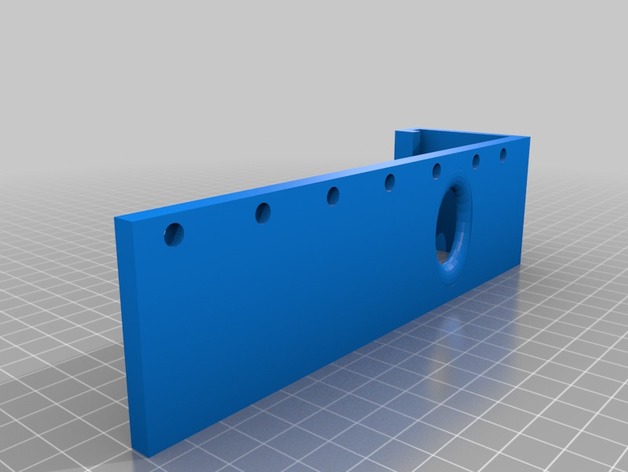
I have been running into problems with new rolls where the filament would spring of and get tangled. I was going to print one of the many filament guides available, but decided to make this. I use a Yorkville music stand light to light up the build plate when printing. Its pretty bright for its size, and you can power it off a spare usb port on the raspberry pi (assuming you use one for octoprint, but any usb port will work). I use the light both for checking in remotely and for the time lapses I create with octoprint. I initially had the light clipped to the frame of the printer but wanted to bring the light arms more forward to take care of some shadows. the holes in the side allow tie wraps to keep the power cord out of the way.
The light I use can be found here: https://www.long-mcquade.com/12870/Band/Metronomes_Tuners_Stands/Yorkville_Sound/Dual_Music_Stand_Lite.htm -
Christmas star and bells 3D Print Model
Summary
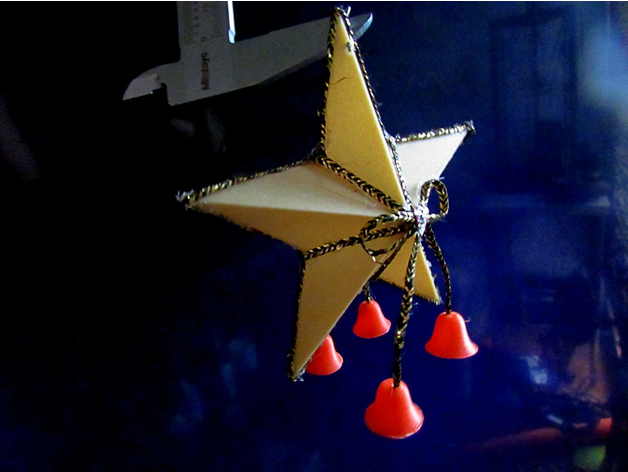
I created a Christmas ornament. Printed them with woodPLA and red bells
Print Settings
Printer:
Anet A8 Rafts:
No Resolution:
.06 Infill:
0% Notes:
Printed both single layer spiral vase. Two stars are glued together back to back. The bells have to be printed slow (<10) to keep detail. -
Chain Harness for Santa Sleigh with Reindeer and Lego minifigures 3D Print Model
Summary
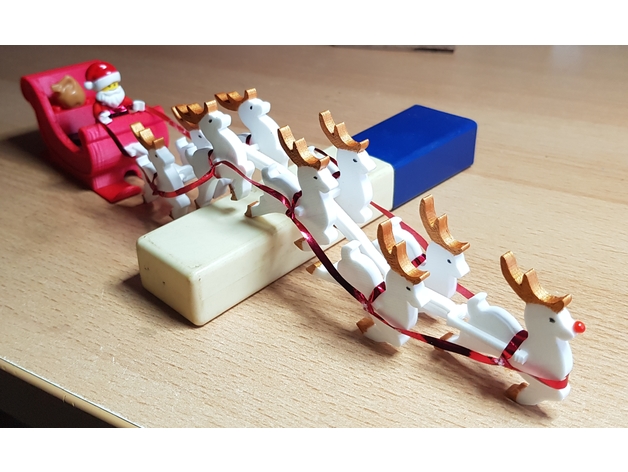
This was already a fantastic design, but I’ve made another harness for the reindeer. This one allows for a reindeer in front (Rudolph!, I glued a pinhead on the nose). Also, it is build of links that form a chain and allow some movement along the harness and you can vary the number of reindeer by adding or subtracting links. Just attach the Start Link to the sleigh and snap the links to it. (The reindeer still have to be glued to the links though).
I’ve added the files for the separate links as well as the collages I’ve used for the assembly with 9 reindeer.
Merry Christmas!
Print Settings
Printer Brand:
Ultimaker Printer:
Ultimaker 3 Rafts:
Doesn’t Matter Supports:
Yes Resolution:
.2 Infill:
20% Notes:
Alternatively, you can position the links with the t-shaped front down to the building plate. This will save a lot of support, though it might need a raft because it will get relatively tall. -
Key storage and chain 3D Print Model
Summary
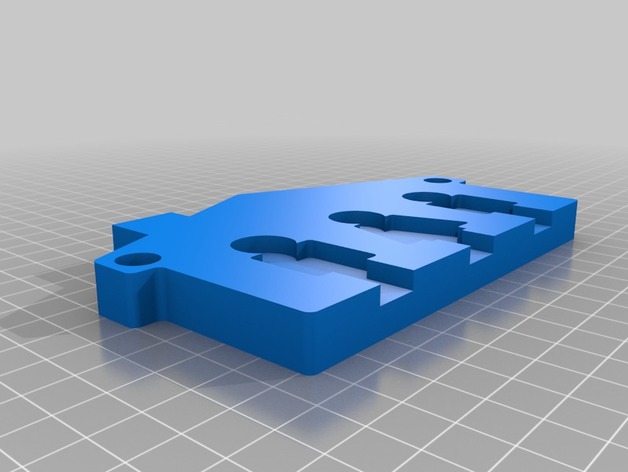
Someone is asking for this kind of key holder/storage. Grab it if you like. -
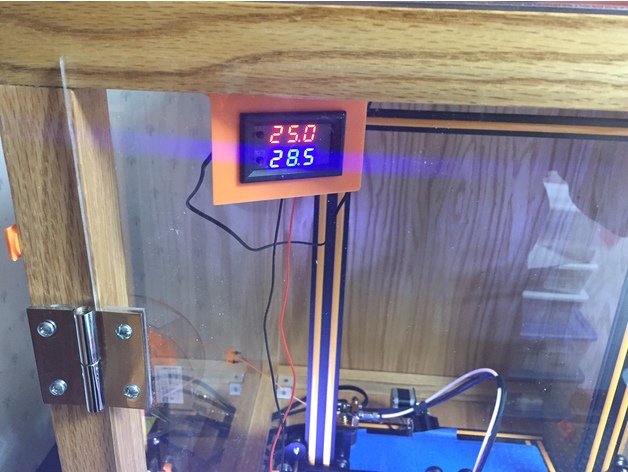
Mounting Bracket for Banggood Temperature sensor and fan control switch 3D Print Model
Summary
This is just a simple bracket to mount a Banggood temperature sensor and fan control switch I am using to monitor the temperature inside my CR-10 enclosure. It has a relay that can turn on a fan (non-PWM) base on the trigger temperature.
Link to the Banggood temperature sensor https://www.banggood.com/DC12V-50-110-Degree-LED-Digital-Thermostat-Temperature-Control-Smart-Sensor-Switch-p-1143380.html -
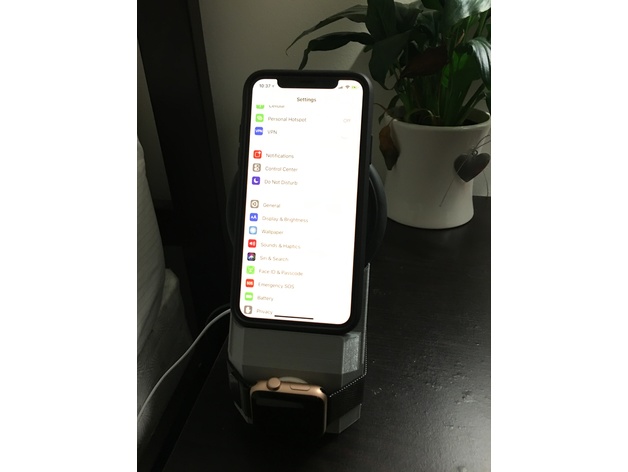
iPhone X and Apple Watch Wireless Charging Stand 3D Print Model
Summary
Vertical charging stand I designed in Fusion 360 to fit the Mophie QI Wireless charger and the Apple watch charger. Shown in the picture is an iPhone X and an Apple Watch charging at the same time. The iPhone X is encased in a Spigen Ultra Hybrid Case. The Mophie QI charger should also work with the iPhone 8/8 Plus but I haven’t personally tested them with my stand.
Print Settings
Printer Brand:
Prusa Printer:
i3 MK2S Rafts:
No Supports:
Yes Resolution:
0.3 Infill:
15% Notes:
Fast Honeycomb Infill
Printed at 75 mm/s
Extruder Nozzle 0.4mm
Total Print Time ~ 5hrs -
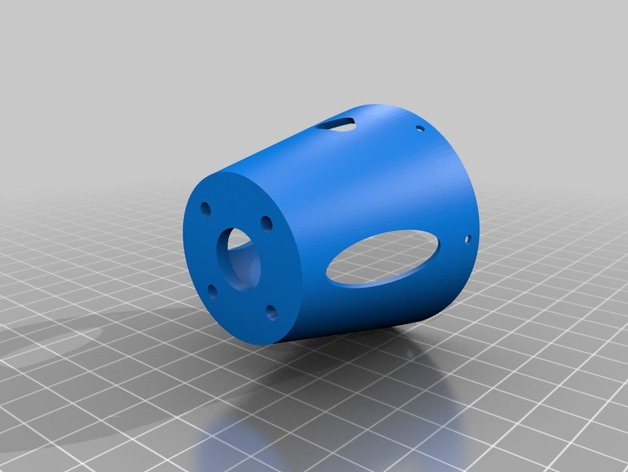
Modified servo mounts and motormount 3D Print Model
Summary
These are STL files that Wersy made for my Red duck.
I wanted to use bigger servos and a stronger motor. Used HK 151538 hobby king servos.https://hobbyking.com/en_us/hobbykingtm-hk15138-standard-analog-servo-4-3kg-0-17sec-38g.html It needs to have both the mount and the slot
Also used a heavier motor. So a new shorter nose was used. I felt that the plane needed better take off performance. -
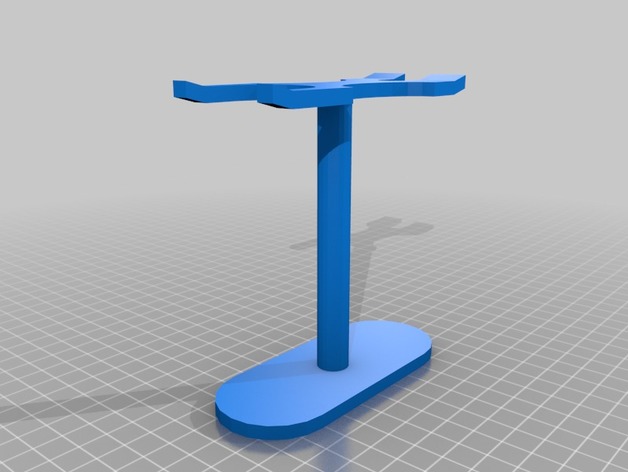
DE Safety Razor and Brush Stand 3D Print Model
Summary
Rotate so its laying flat and print with supports. Works with Rockwell 6s/6c or Merkur 34c razors.
Print Settings
Printer:
Tevo Tarantula Rafts:
No Supports:
Yes Resolution:
.2 Infill:
20%
Post-Printing -
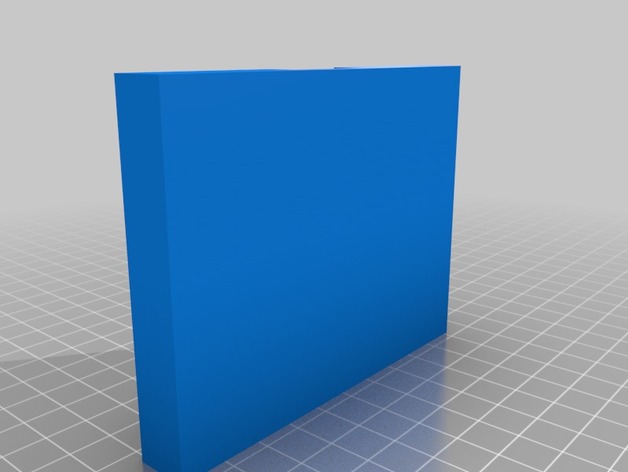
BETAFPV 1S LIPO CHARGER AND BATTERY HOLDER 3D Print Model
Summary
The time has come to start switching over to indoor flying in my neck of the woods. This item Holds the BETAFPV 1S lipo battery charger with storage for both charged and uncharged batteries and a few spots for misc items.
Charger has a nice snug fit and will not fall out of holder.
Print Settings
Printer Brand:
Robo 3D Printer:
R1 ABS + PLA Model Rafts:
No Supports:
No Resolution:
.100 – .300 Infill:
100% Notes:
easy print, not real clean up needed after print.
Post-Printing
No clean up is really needed, use a color paint marker if you want to add color to the text.
How I Designed This
Fusion 360 -
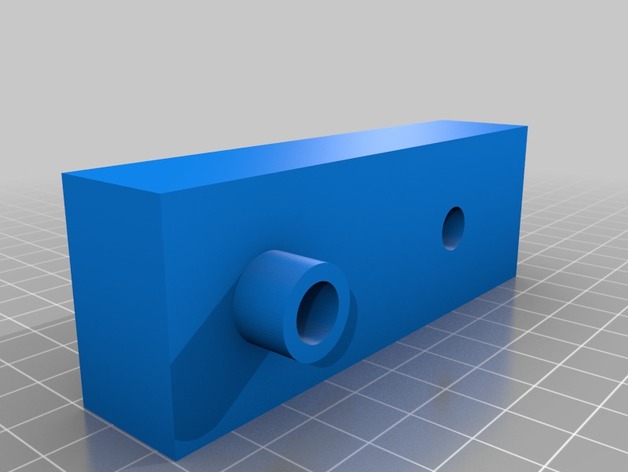
Black and Decker Workmate Bench Top replacement Block 3D Print Model
Summary
Lost some of these on my workmate over the years so modeled one up and printed. Works well.
Print Settings
Printer Brand:
Prusa Printer:
i3 MK2S Rafts:
Yes Supports:
Yes Resolution:
.1 Infill:
50% -
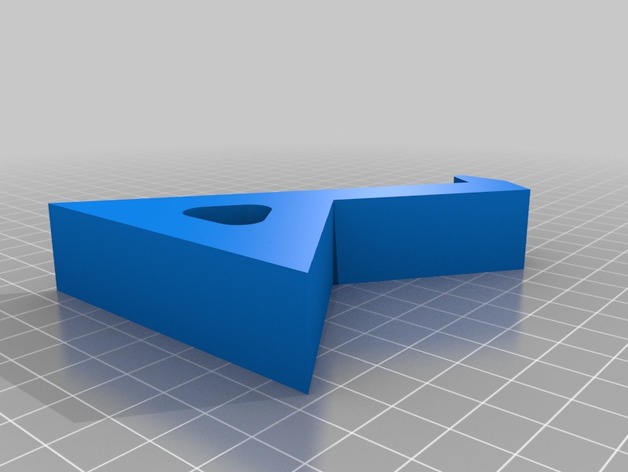
60% and under keyboard display 3D Print Model
Summary
Just a simple Wall display for most 60% and under keyboards. sized to wall mount with large command strips. print 2.
Print Settings
Printer Brand:
Prusa Printer:
Prusa Clone Rafts:
Doesn’t Matter Supports:
No Resolution:
.3 Infill:
15% -
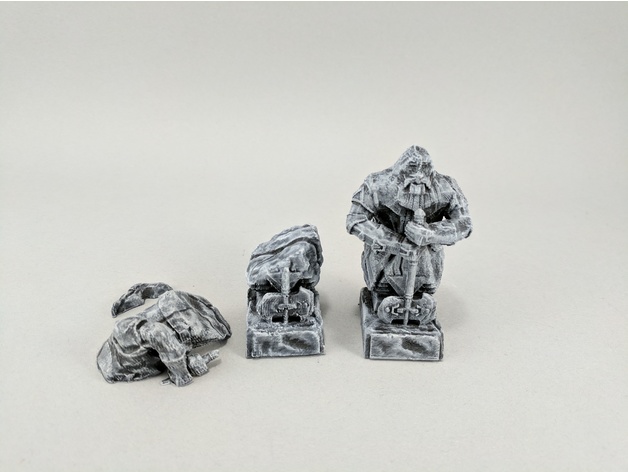
Worn and Broken Dwarven Statues 3D Print Model
Summary
This is a remix of Wargaming_Miniature_Showcase’s Dwarven Paragon with Battleaxe. I needed a few old and broken dwarven statutes for my game so I roughed up and broke apart this model.
Enjoy!
Print Settings
Printer:
Maker Select v2 Rafts:
No Supports:
Yes Resolution:
.1mm Infill:
12%-15% -
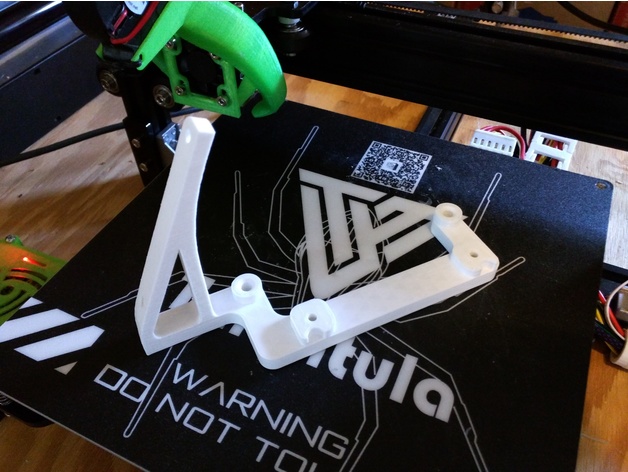
Display and board stand for Tevo Tarantula 3D Print Model
Summary
It’s a display and board stand for the Tevo Tarantula that keeps all the fancy clear acrylic pieces. Print twice, with one of them mirrored. Supports are helpful for the upside-down countersunk holes in the base, but not strictly necessary.
I will eventually tame this rat’s nest of wires; this is just the first step. -
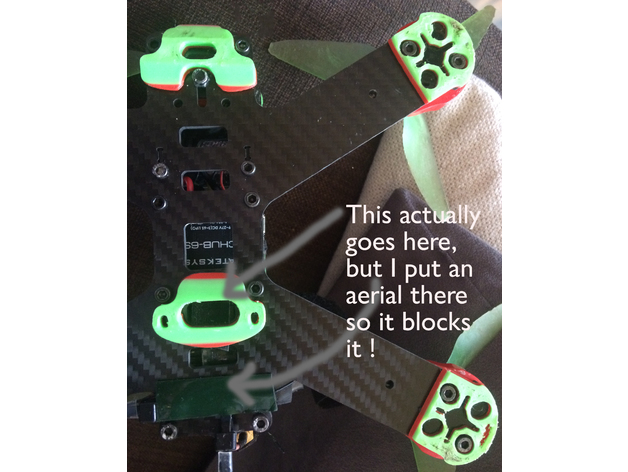
Lisam LS-210 frame and battery protectors 3D Print Model
Summary
First make sure that you measure these in your 3D printing software before printing.
These protect your arm ends and front and back – and are sacrificial to protect your frame from delaminating or splintering – so print a few and save your frame.
The top plate is to protect top mounted batteries from puncturing on the bolt heads.
Here are the cnc files for the actual frame https://grabcad.com/library/lisam210-1
Buy the frame £11 https://www.banggood.com/Lisam-LS-210-210mm-Carbon-Fiber-Frame-Kit-Mini-Quadcopter-p-1001216.html?p=60160590113042017023
Get it quicker for more money – http://amzn.to/2isRHQi
Print Settings
Printer:
Flux 3D v1 Rafts:
No Supports:
No Resolution:
any Infill:
any Notes:
Make sure you measure before printing – get your scale right. -
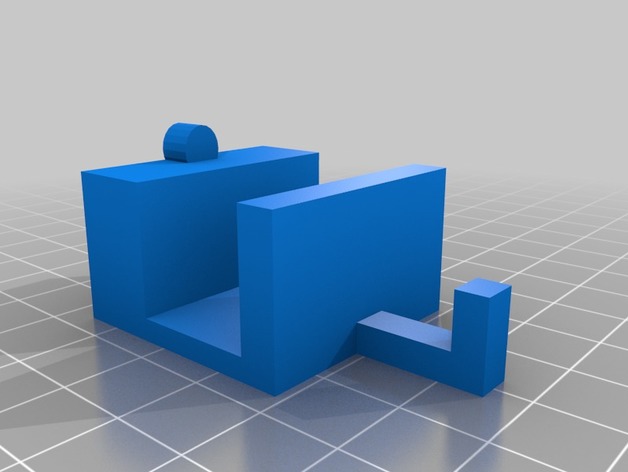
Wallet and Key Holder for Small Wallets 3D Print Model
Summary
I couldn’t find one that really fit my usecase so I designed my own! This is designed for very slim wallets or money clips at or around 18mm. I used Scotch Extreme mounting tape to mount it to the wall. I hope this is as helpful to you as it is to me!
Print Settings
Printer Brand:
Wanhao Printer:
Wanhao Duplicator i3 Plus Rafts:
No Supports:
No Resolution:
.2 Infill:
20 -
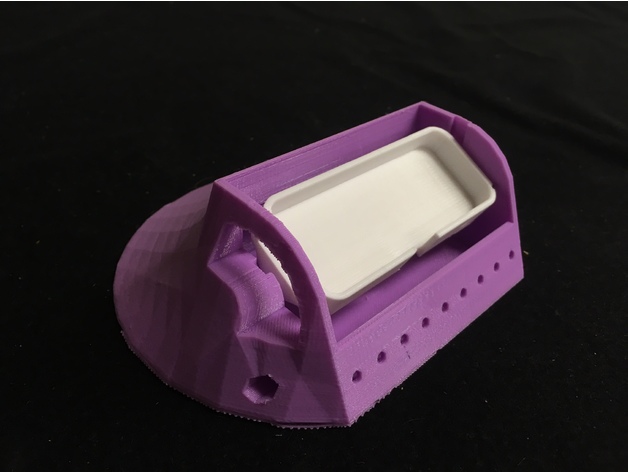
Leap Motion and LED stand 3D Print Model
Summary
Leap motion sensor holder with LED set facing user.
This is to part of an installation in which a D/VJ uses the Leap sensor to control audio/video art while facing an audience. The LEDs light up the user, while the organic shape of the sensor holder hides the electronics from the audience.
The Leap motion sensor can be titled to optimize its orientation towards the user, the cable is routed to the left through a slot. A hole in the base is added to route additional cables powering and controlling the LEDs
The Leap sensor holder is adapted from https://www.thingiverse.com/thing:1535393. -
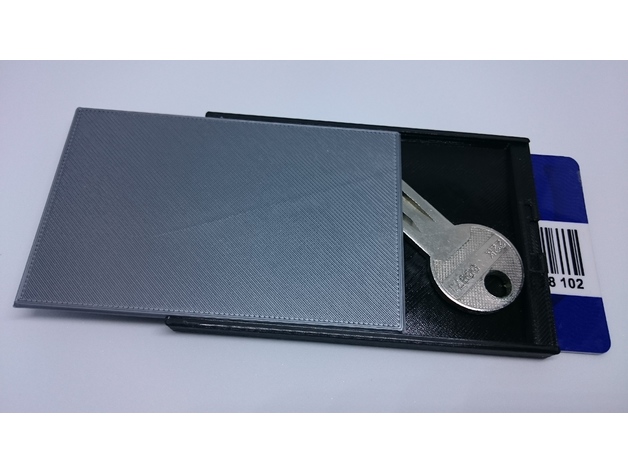
ID Card Case And Trinket Box 3D Print Model
Summary
Two purposes are served by this little lifehack gadget: It is a case for a single ID-1 card with standard dimensions as well as providing a little box for additional objects.
For instance, it can accommodate the RFID key card and the standard key if it is practical to to hold both access keys together.
Print Settings
Printer Brand:
Prusa Printer:
i3 MK2S Rafts:
No Supports:
No Resolution:
0.2 mm Infill:
25% Notes:
Bridging precision of your printer is crucial for this design!
Please note that the entire space for the ID card is bridged since no support is possible in here. Make sure your slicer does not introduce a supporting material. -
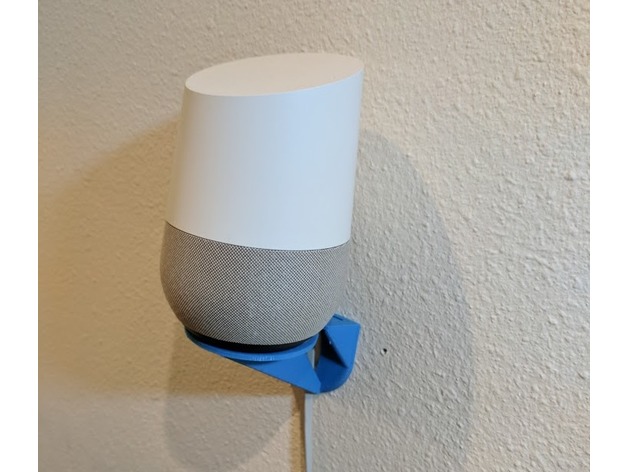
Clean and Sturdy Google Home/Alexa wall mount 3D Print Model
Summary
Sturdy wall mount for your new google home or amzon alexa. Prints in one piece. No support needed.
Print Settings
Printer:
Prusa i3 Rafts:
No Supports:
No Resolution:
.2 or .3 Infill:
60% Notes:
Prints quick and easy -
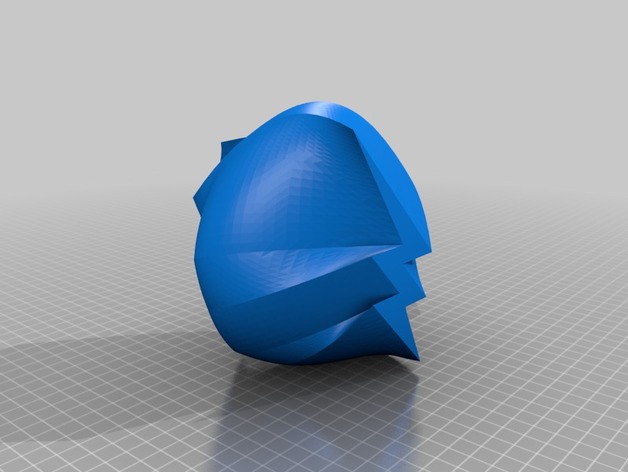
Flash and Arrow, lofted vase 3D Print Model
Summary
This is a vase made for Mr. Keller’s Drafting 2 class at Billings Senior High, It is made form the Cw’s Flash and Arrow Logos -
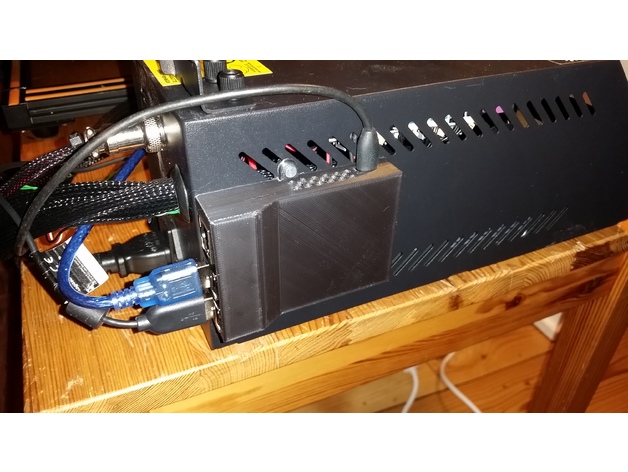
Enclosure for Raspberry Pi 3 and Creality CR-10 3D Print Model
Summary
This is an enclosure that is fastened with screws throw the grid at the side of the controller box. Therefore it is specifically made for the Creality CR-10 but will of course fit at other places when one want the box to be permanently attached to something.
The board is fastened by melting those pins like a rivet. -
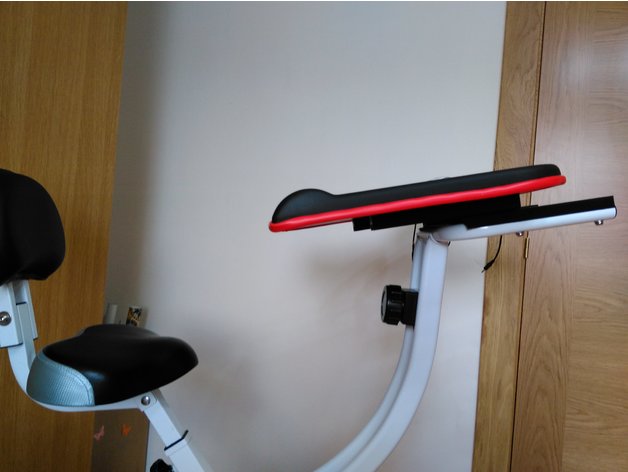
Table slider Ultrasport F-Bike 150 and F-Bike 200 3D Print Model
Summary
This is a slider for a “Ultrasport F-Bike 150 and F-Bike 200 table” which I designed because the table was too far away for me. With this pieces the table is ~20cm closer and in addition you can remove the table easily and reduce the width when the bycicle is closed.
You must print “top.stl” 2 two times.
Extra staff you need:
4x screws
4x nuts -
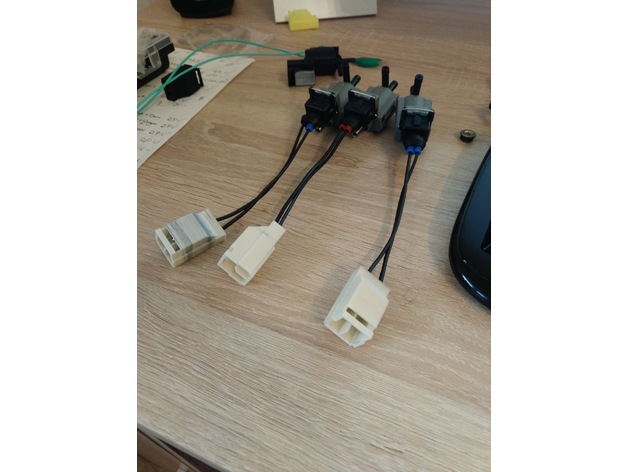
RX7 S7 and S8 Solenoid Connector 3D Print Model
Summary
Connector to make a pigtail or adapter for non mazda solenoids.
Standard Power Time Male Connector 33-0626 is needed. -
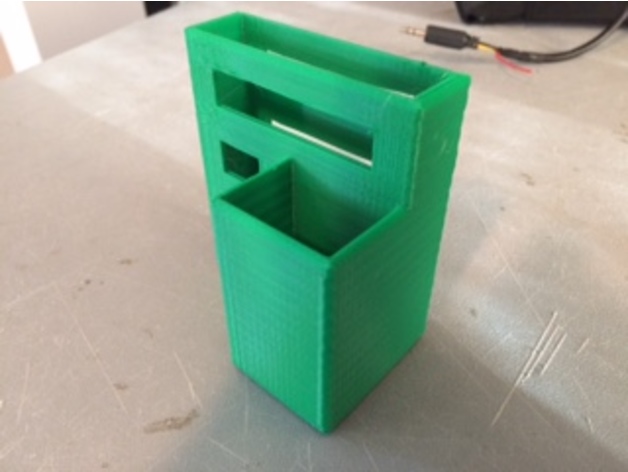
MFD Link (R Link) Mount and Battery Holder 3D Print Model
Summary
Use heavy duty mounting tape or velcro to mount to back of RC Tx. -
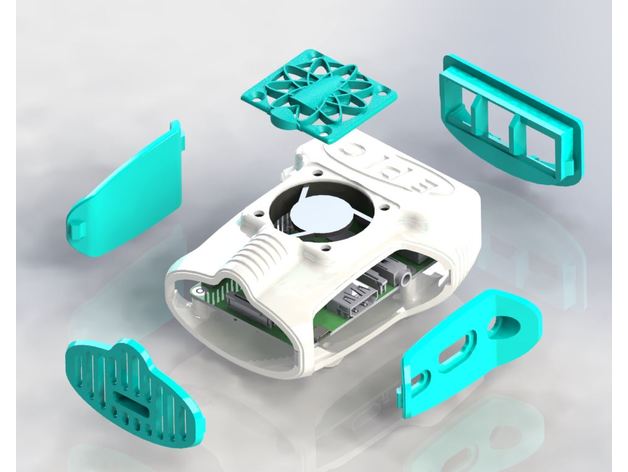
ePIc Pi Addons ( raspberry pi 2 and 3 case ) 3D Print Model
Summary
These are the addon plates for my raspberry pi 2 and 3 case called ePIc Pi. The main body can be purchased by itself that allows these plates to be printed in any color you wish to match your color scheme.
The ePIc pi mounts directly to 2020 extrusion for use with octopi via the mounting bracket I have included here.
I plan on releasing many upgrade plates to the main body after receiving feedback on the current plates.
The body can be found here.
https://www.etsy.com/listing/544101702/epic-pi-body-only?ga_order=date_desc&ga_search_type=all&ga_view_type=gallery&ga_search_query=epic pi&ref=sr_gallery_3
or search epicpi -
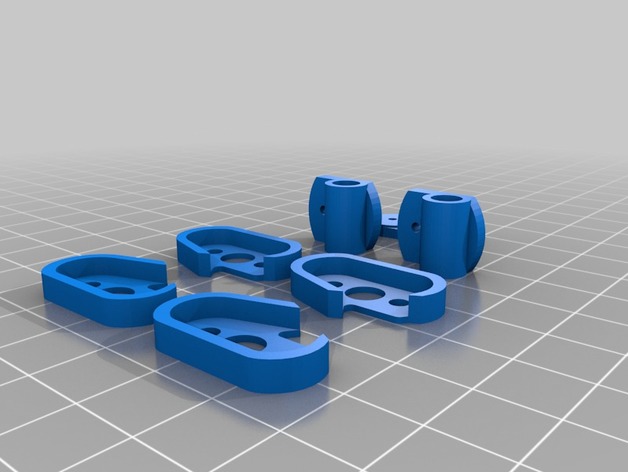
Tomoquads UL4 and UL3 3D Printed Accessories 3D Print Model
Summary
Tomoquads 3d printed accessories for the UL4 and UL3
Print only in TPU with 20-30% infill while the center bushing must be printed in PLA or ABS with high 50% infill
www.tomoquads.com -
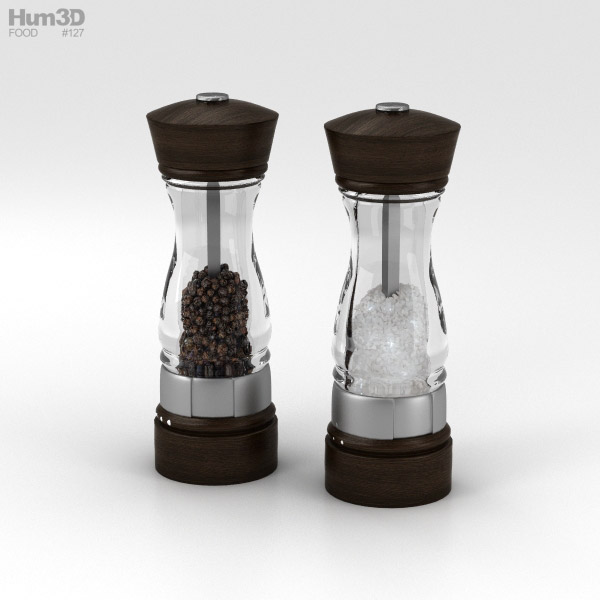
Salt and Pepper 3D Model
The 3D model was created according to the proportions of a generic object.
All main parts of the model are separated objects. Therefore, you can easy change all materials. We provide several formats for each model, most of them available by default.
Images rendered with using V-Ray plugin (we don’t include lighting and environment to a set). -
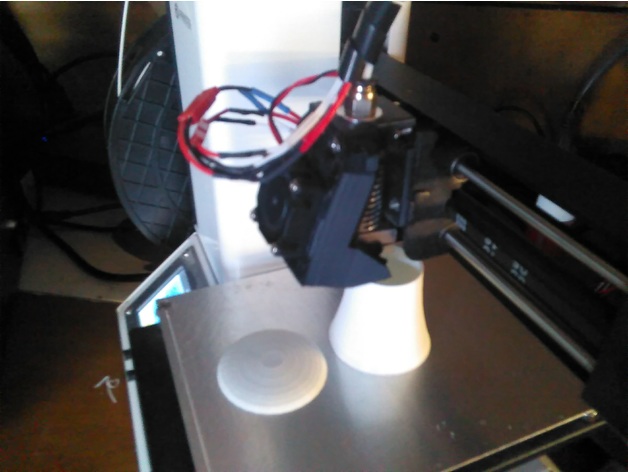
Monoprice Select Mini E3D 30mm single fan hotend and nozzle cooling 3D Print Model
Summary
I wanted to upgrade my MP select mini (V1) with an e3d hot end, but couldn’t find a holder for it that didn’t require an additional new fan. The closest I could find was Toolboxx’s upgrade for a single fan, but that still assumed I would be switching out the fan for a 40mm fan. So I did a simple remix.
All the 3D printed parts you need are included. You will need 2 M3x15mm screws and M3 bolts. -
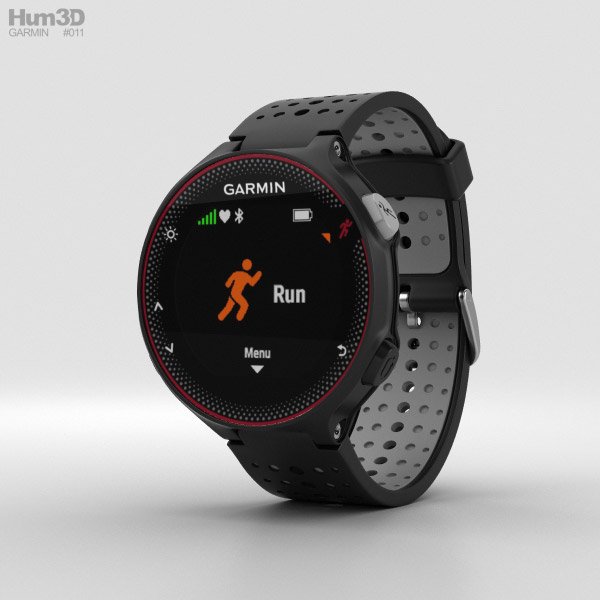
Garmin Forerunner 235 Black and Gray 3D Model
The 3d model based on a real
smartwatch, created according to the original dimensions.
All main parts of the model are separated objects. Therefore, you can easy change all materials. We provide several formats for each model, most of them available by default.
* images rendered with using V-Ray plugin (we don’t include lighting and environment to a set). -
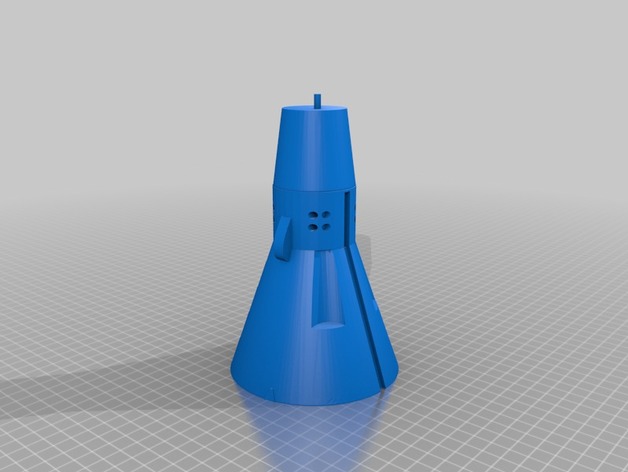
Gemini Capsule and Service module 3D Print Model
Summary
Gemini Space Capsule and Service module,
Added Stand
Print Settings
Printer Brand:
Robo 3D Printer:
C2 R2 Rafts:
No Supports:
No Resolution:
.2 mm Infill:
15% Notes:
Print each piece in different colors,
Dark Blue for the Capsule and White for the Service module and stripes.you may need to add a brim or raft for the stripes.
Post-Printing
Glue the Stripes into the grooves in the capsule and then glue the service module onto the capsule.
paint the windows either white or silver.
How I Designed This
This was a remix, using Tinkercad I separated the Capsule from the service module, Then I added the attitude control rockets to the nose of the capsule and the grooves for the stripe that was used for the parachute deployment track cover. -
SphereO The cute and simple spacecraft 3D Print Model
Summary
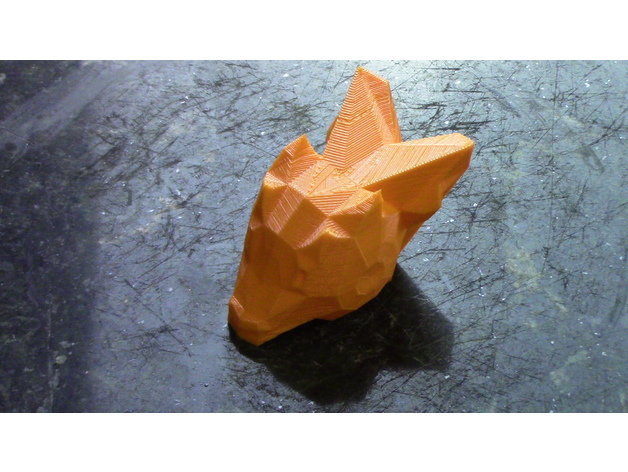
I made this from a simple sphere on VECTARY. It was suppose to just be a simple alien, sci-fi spaceship. But everyone I show it too say it looks like the head or a helmet. While that was unexpected it does give a funny impression that the aliens are driving around in a giant head or helmet. I can see aliens stepping out of the ship with the same looking head.
Print Settings
Printer Brand:
Wanhao Printer:
Wanhao Duplicator i3 V2 Rafts:
No Supports:
No Resolution:
.2 Notes:
I did print this without any infill, however I did not enable any special mode such as a vase mode. I just changed the infill to zero.